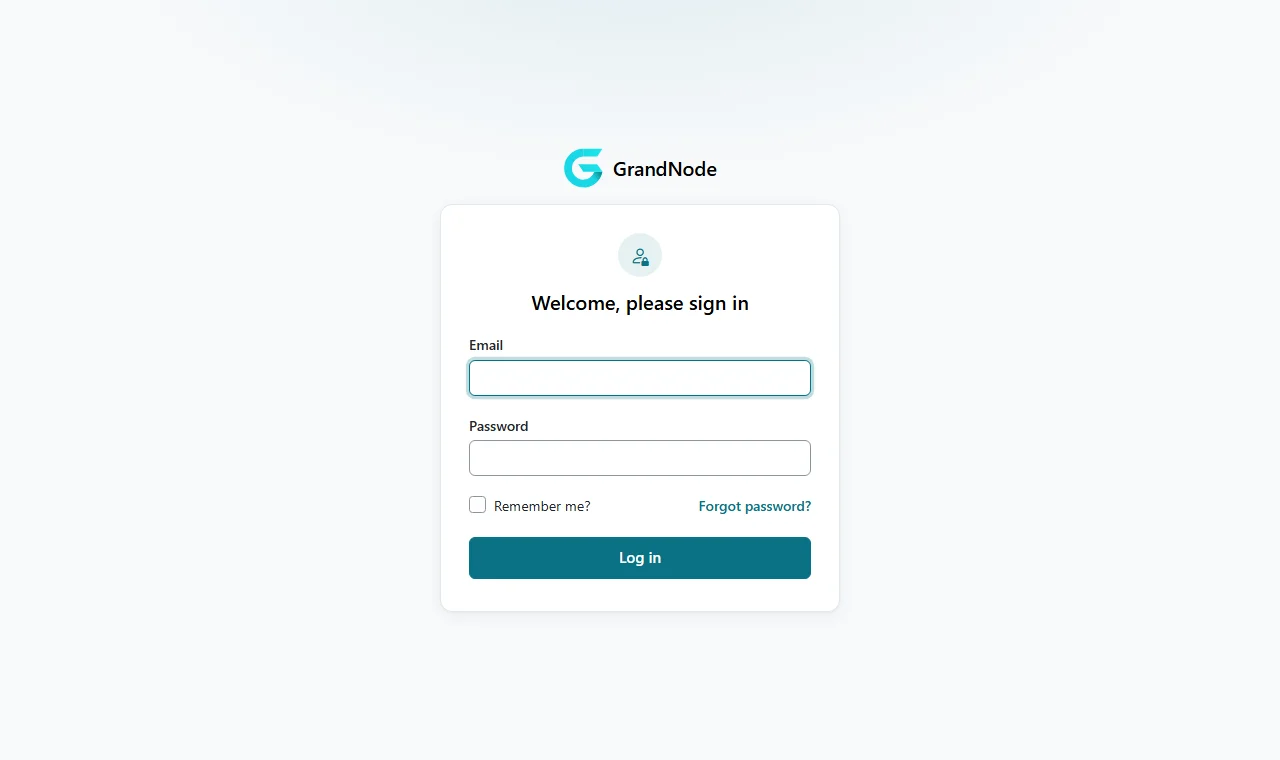
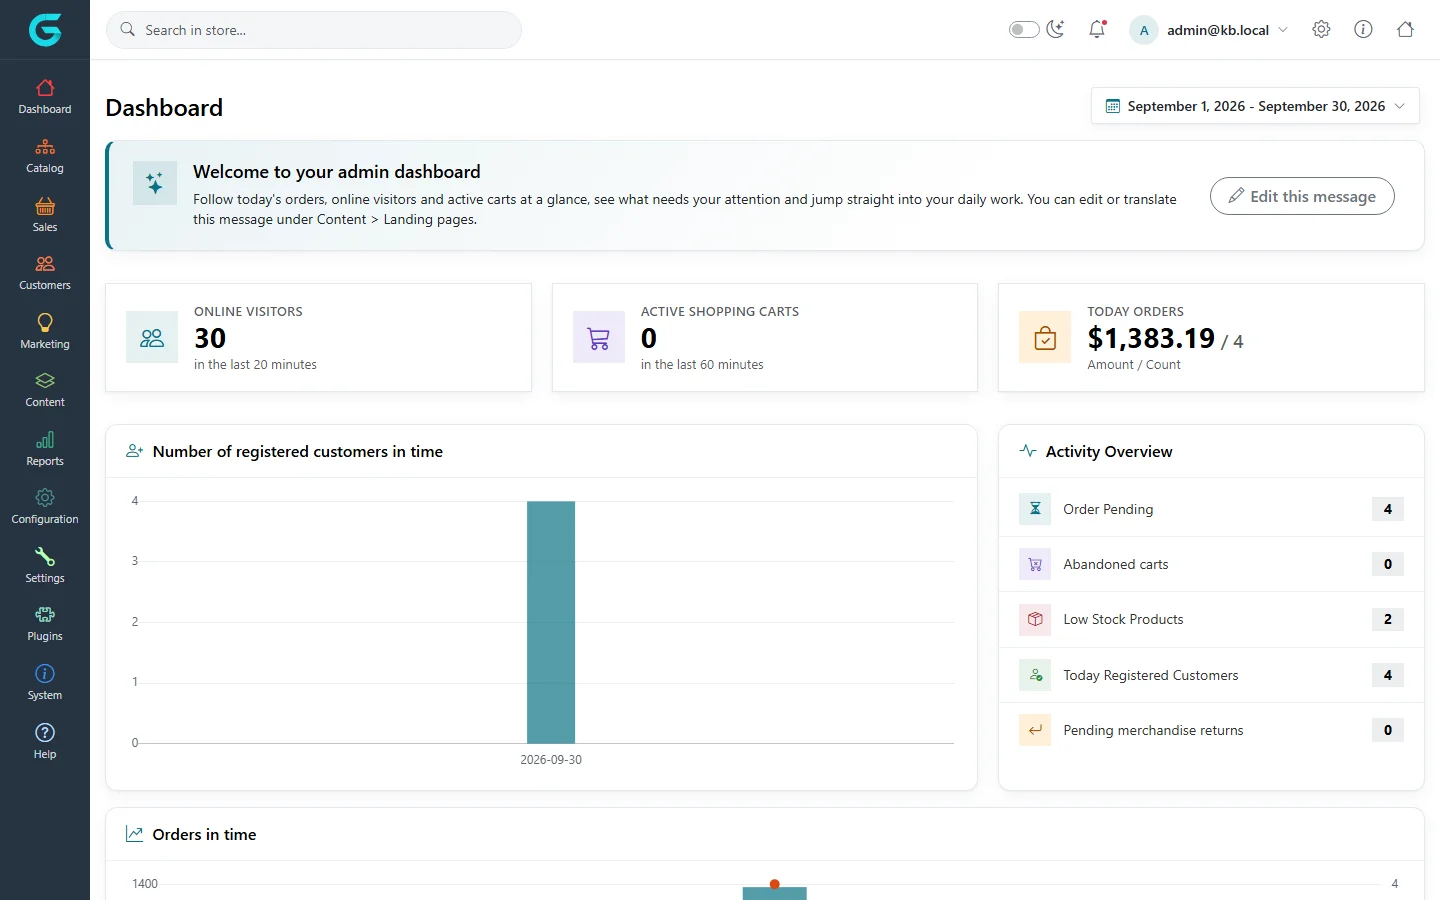
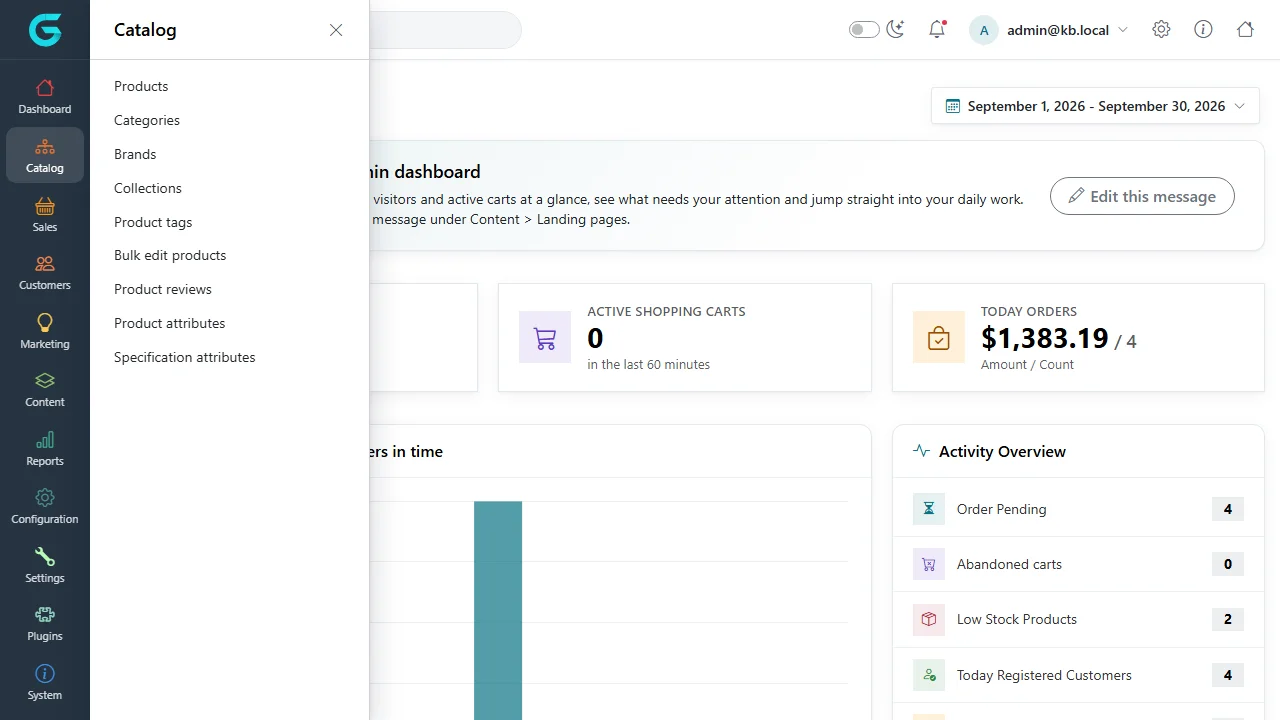
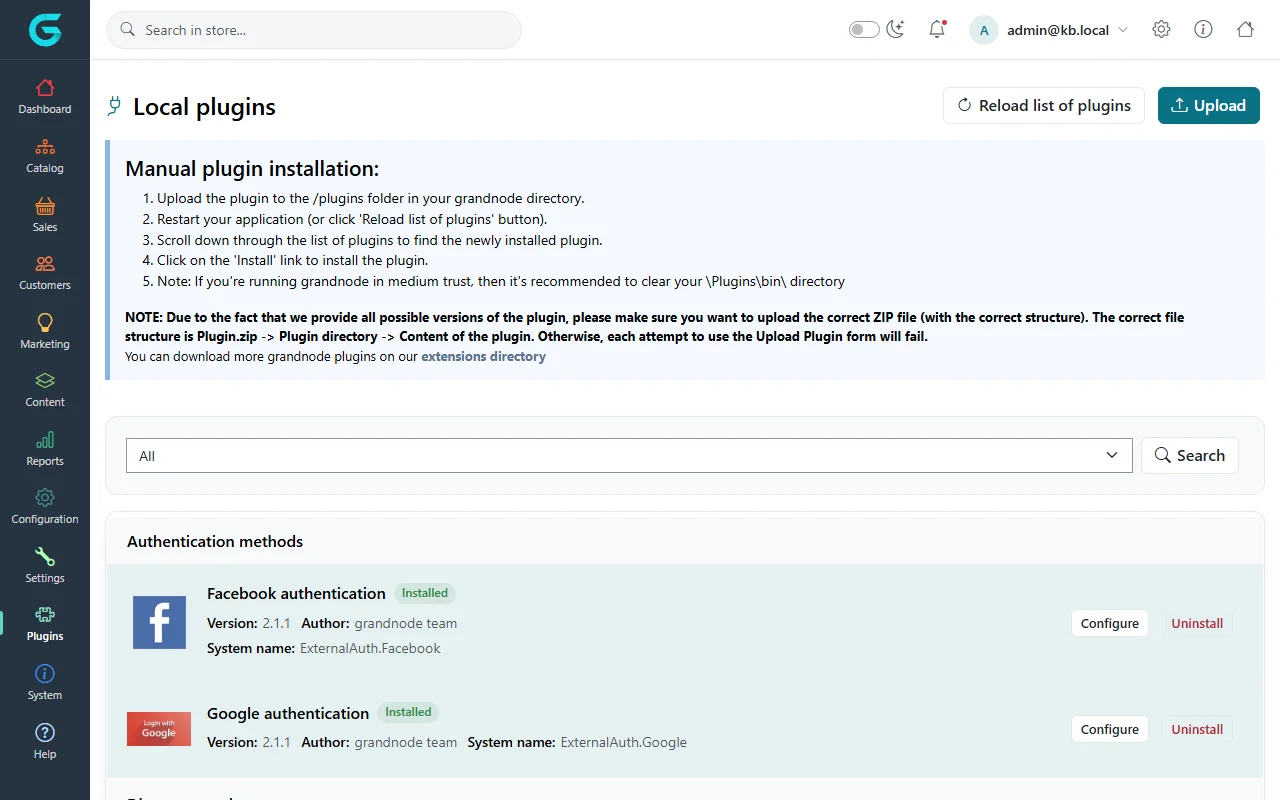
{"ArticleId":null,"Name":"A tour of the Admin panel","Content":"\u003Cp\u003EEverything you configure in GrandNode starts in the Admin panel. This tour shows how to sign in, what the dashboard tells you, where each part of the menu leads, and how the Store owner and Vendor panels differ from it. Use it as a map for the rest of the documentation.\u003C/p\u003E\n\n\u003Ch2 id=\u0022signing-in\u0022\u003ESigning in\u003C/h2\u003E\n\u003Col\u003E\n\u003Cli\u003EOpen \u003Ccode\u003E/admin\u003C/code\u003E on your store\u0027s address, for example \u003Ccode\u003Ehttps://yourstore.com/admin\u003C/code\u003E. If you are not signed in, you are sent to \u003Ccode\u003E/admin/login\u003C/code\u003E.\u003C/li\u003E\n\u003Cli\u003EEnter the \u003Cstrong\u003EEmail\u003C/strong\u003E and \u003Cstrong\u003EPassword\u003C/strong\u003E of the administrator created in the \u003Ca href=\u0022/getting-started-installation-wizard\u0022\u003Einstallation wizard\u003C/a\u003E. Tick \u003Cstrong\u003ERemember me?\u003C/strong\u003E to stay signed in on this computer.\u003C/li\u003E\n\u003Cli\u003EPress \u003Cstrong\u003ELog in\u003C/strong\u003E. The dashboard opens.\u003C/li\u003E\n\u003C/ol\u003E\n\u003Cfigure\u003E\u003Cimg src=\u0022/Plugins/Theme.GrandNodeCom/Content/kb/getting-started/admin-login.webp\u0022 alt=\u0022Admin panel sign-in page with Email and Password fields, Remember me and Forgot password\u0022 width=\u00221280\u0022 height=\u0022760\u0022 loading=\u0022lazy\u0022\u003E\u003Cfigcaption\u003EThe Admin panel sign-in page. Store managers use \u003Ccode\u003E/store/login\u003C/code\u003E, vendors \u003Ccode\u003E/vendor/login\u003C/code\u003E.\u003C/figcaption\u003E\u003C/figure\u003E\n\u003Cp\u003EForgot the password? Use \u003Cstrong\u003EForgot password?\u003C/strong\u003E \u2014 it sends a recovery link to the email address, so an email account must be configured first (see \u003Ca href=\u0022/docs-configuration\u0022\u003EConfiguration\u003C/a\u003E).\u003C/p\u003E\n\n\u003Ch2 id=\u0022the-dashboard\u0022\u003EThe dashboard\u003C/h2\u003E\n\u003Cfigure\u003E\u003Cimg src=\u0022/Plugins/Theme.GrandNodeCom/Content/kb/getting-started/admin-dashboard.webp\u0022 alt=\u0022Admin dashboard with a welcome message, online visitors, active shopping carts, today\u0027s orders, a registered customers chart and the activity overview\u0022 width=\u00221440\u0022 height=\u0022900\u0022 loading=\u0022lazy\u0022\u003E\u003Cfigcaption\u003EThe dashboard. The date range in the top right corner drives the charts.\u003C/figcaption\u003E\u003C/figure\u003E\n\u003Cp\u003EFrom top to bottom:\u003C/p\u003E\n\u003Cul\u003E\n\u003Cli\u003E\u003Cstrong\u003EWelcome message\u003C/strong\u003E \u2014 a text you can change with \u003Cstrong\u003EEdit this message\u003C/strong\u003E; it is a landing page under \u003Cstrong\u003EContent \u2192 Landing pages\u003C/strong\u003E.\u003C/li\u003E\n\u003Cli\u003E\u003Cstrong\u003EOnline visitors\u003C/strong\u003E (last 20 minutes), \u003Cstrong\u003EActive shopping carts\u003C/strong\u003E (last 60 minutes) and \u003Cstrong\u003EToday orders\u003C/strong\u003E (amount and count). Each tile links to its list.\u003C/li\u003E\n\u003Cli\u003E\u003Cstrong\u003ENumber of registered customers in time\u003C/strong\u003E and \u003Cstrong\u003EOrders in time\u003C/strong\u003E \u2014 charts for the selected date range.\u003C/li\u003E\n\u003Cli\u003E\u003Cstrong\u003EActivity Overview\u003C/strong\u003E \u2014 counters for what needs attention: \u003Cstrong\u003EOrder Pending\u003C/strong\u003E, \u003Cstrong\u003EAbandoned carts\u003C/strong\u003E, \u003Cstrong\u003ELow Stock Products\u003C/strong\u003E, \u003Cstrong\u003EToday Registered Customers\u003C/strong\u003E and \u003Cstrong\u003EPending merchandise returns\u003C/strong\u003E.\u003C/li\u003E\n\u003Cli\u003E\u003Cstrong\u003ELatest orders\u003C/strong\u003E \u2014 the newest orders with customer, payment status and total; \u003Cstrong\u003EView more\u003C/strong\u003E opens the order list.\u003C/li\u003E\n\u003Cli\u003E\u003Cstrong\u003ENews from GrandNode\u003C/strong\u003E \u2014 announcements from grandnode.com.\u003C/li\u003E\n\u003C/ul\u003E\n\n\u003Ch2 id=\u0022the-side-menu\u0022\u003EThe side menu\u003C/h2\u003E\n\u003Cp\u003EThe dark rail on the left holds the main sections. Clicking a section opens a panel with its pages; the close button (\u00D7) or a click outside hides it.\u003C/p\u003E\n\u003Cfigure\u003E\u003Cimg src=\u0022/Plugins/Theme.GrandNodeCom/Content/kb/getting-started/admin-menu-flyout.webp\u0022 alt=\u0022Admin side menu with the Catalog section open, listing Products, Categories, Brands, Collections and more\u0022 width=\u00221280\u0022 height=\u0022720\u0022 loading=\u0022lazy\u0022\u003E\u003Cfigcaption\u003EClicking \u003Cstrong\u003ECatalog\u003C/strong\u003E opens its pages.\u003C/figcaption\u003E\u003C/figure\u003E\n\u003Ctable\u003E\n\u003Cthead\u003E\u003Ctr\u003E\u003Cth\u003ESection\u003C/th\u003E\u003Cth\u003EWhat you find there\u003C/th\u003E\u003C/tr\u003E\u003C/thead\u003E\n\u003Ctbody\u003E\n\u003Ctr\u003E\u003Ctd\u003EDashboard\u003C/td\u003E\u003Ctd\u003EDashboard, Statistics, Active carts and wishlists, Online customers\u003C/td\u003E\u003C/tr\u003E\n\u003Ctr\u003E\u003Ctd\u003ECatalog\u003C/td\u003E\u003Ctd\u003EProducts, Categories, Brands, Collections, Product tags, Bulk edit products, Product reviews, Product attributes, Specification attributes\u003C/td\u003E\u003C/tr\u003E\n\u003Ctr\u003E\u003Ctd\u003ESales\u003C/td\u003E\u003Ctd\u003EOrders, Shipments, Merchandise returns, Payment Transactions, Order\u0027s tags, Checkout Attributes, Order status\u003C/td\u003E\u003C/tr\u003E\n\u003Ctr\u003E\u003Ctd\u003ECustomers\u003C/td\u003E\u003Ctd\u003ECustomers, Customer groups, Customer tags, Vendors, Vendor reviews, Sales employees, Customer and Address attributes\u003C/td\u003E\u003C/tr\u003E\n\u003Ctr\u003E\u003Ctd\u003EMarketing\u003C/td\u003E\u003Ctd\u003EDiscounts, Gift vouchers, Affiliates, Contact Attributes, Newsletter, Push notifications, Documents\u003C/td\u003E\u003C/tr\u003E\n\u003Ctr\u003E\u003Ctd\u003EContent\u003C/td\u003E\u003Ctd\u003ELanding pages, Message templates, Knowledgebase, News, Blog, Manage courses\u003C/td\u003E\u003C/tr\u003E\n\u003Ctr\u003E\u003Ctd\u003EReports\u003C/td\u003E\u003Ctd\u003ELow stock report, Bestsellers, Products never purchased, Country report, Customer reports\u003C/td\u003E\u003C/tr\u003E\n\u003Ctr\u003E\u003Ctd\u003EConfiguration\u003C/td\u003E\u003Ctd\u003EStores, Permissions, Email Accounts, Languages, Currencies, Countries, SEO Names, Admin menu, Payment, Shipping, Measures, Tax, Layouts\u003C/td\u003E\u003C/tr\u003E\n\u003Ctr\u003E\u003Ctd\u003ESettings\u003C/td\u003E\u003Ctd\u003EGeneral, Catalog, Customer, Sales, Media, Content, Vendor, Push notifications, Admin search, System settings\u003C/td\u003E\u003C/tr\u003E\n\u003Ctr\u003E\u003Ctd\u003EPlugins\u003C/td\u003E\u003Ctd\u003EExternal authentication, Widgets, Local plugins\u003C/td\u003E\u003C/tr\u003E\n\u003Ctr\u003E\u003Ctd\u003ESystem\u003C/td\u003E\u003Ctd\u003ESystem information, Message Queue, Message Contact form, Maintenance, Schedule tasks, Developer Tools\u003C/td\u003E\u003C/tr\u003E\n\u003Ctr\u003E\u003Ctd\u003EHelp\u003C/td\u003E\u003Ctd\u003ELinks to support services, documentation and the community\u003C/td\u003E\u003C/tr\u003E\n\u003C/tbody\u003E\n\u003C/table\u003E\n\u003Cp\u003EThe difference between \u003Cstrong\u003EConfiguration\u003C/strong\u003E and \u003Cstrong\u003ESettings\u003C/strong\u003E: Configuration holds lists of things you create (stores, languages, currencies, payment and shipping methods), Settings holds switches and options that change behaviour.\u003C/p\u003E\n\n\u003Ch2 id=\u0022the-top-bar\u0022\u003EThe top bar\u003C/h2\u003E\n\u003Cul\u003E\n\u003Cli\u003E\u003Cstrong\u003ESearch in store...\u003C/strong\u003E \u2014 jump to products, orders, customers or admin pages by typing.\u003C/li\u003E\n\u003Cli\u003E\u003Cstrong\u003EDark mode\u003C/strong\u003E switch.\u003C/li\u003E\n\u003Cli\u003E\u003Cstrong\u003ENotifications\u003C/strong\u003E (bell) \u2014 for example when a new GrandNode version is available.\u003C/li\u003E\n\u003Cli\u003E\u003Cstrong\u003EYour account\u003C/strong\u003E \u2014 \u003Cstrong\u003EMy profile\u003C/strong\u003E and \u003Cstrong\u003ELogout\u003C/strong\u003E.\u003C/li\u003E\n\u003Cli\u003E\u003Cstrong\u003EGear\u003C/strong\u003E \u2014 \u003Cstrong\u003EClear memory cache\u003C/strong\u003E and \u003Cstrong\u003ERestart application\u003C/strong\u003E.\u003C/li\u003E\n\u003Cli\u003E\u003Cstrong\u003EInfo\u003C/strong\u003E \u2014 documentation, community and the installed GrandNode version.\u003C/li\u003E\n\u003Cli\u003E\u003Cstrong\u003EHome\u003C/strong\u003E \u2014 opens the storefront.\u003C/li\u003E\n\u003C/ul\u003E\n\n\u003Ch2 id=\u0022plugins-page\u0022\u003EPlugins\u003C/h2\u003E\n\u003Cp\u003E\u003Cstrong\u003EPlugins \u2192 Local plugins\u003C/strong\u003E lists every plugin grouped by type, with its version, system name and status. From here you install, uninstall and configure plugins, upload new ones as ZIP files and reload the list.\u003C/p\u003E\n\u003Cfigure\u003E\u003Cimg src=\u0022/Plugins/Theme.GrandNodeCom/Content/kb/getting-started/local-plugins.webp\u0022 alt=\u0022Local plugins page listing Facebook and Google authentication plugins as Installed with Configure and Uninstall buttons\u0022 width=\u00221280\u0022 height=\u0022800\u0022 loading=\u0022lazy\u0022\u003E\u003Cfigcaption\u003EPayment, shipping and tax plugins are configured from their own pages under Configuration.\u003C/figcaption\u003E\u003C/figure\u003E\n\n\u003Ch2 id=\u0022store-and-vendor-panels\u0022\u003EStore owner and Vendor panels\u003C/h2\u003E\n\u003Cp\u003EThe Store owner panel (\u003Ccode\u003E/store\u003C/code\u003E) and the Vendor panel (\u003Ccode\u003E/vendor\u003C/code\u003E) look the same but show fewer sections and only their own data. A store manager has no Plugins, System, Permissions or Stores; a vendor sees only Dashboard, Catalog, Sales, Customers (vendor reviews), Reports and Help. See \u003Ca href=\u0022/getting-started-what-is-grandnode\u0022\u003EWhat is GrandNode\u003C/a\u003E.\u003C/p\u003E\n\n\u003Ch2 id=\u0022related\u0022\u003ERelated\u003C/h2\u003E\n\u003Cul\u003E\n\u003Cli\u003E\u003Ca href=\u0022/getting-started-first-steps\u0022\u003EFirst steps for a new store\u003C/a\u003E\u003C/li\u003E\n\u003Cli\u003E\u003Ca href=\u0022/docs-configuration\u0022\u003EConfiguration\u003C/a\u003E, \u003Ca href=\u0022/docs-catalog\u0022\u003ECatalog\u003C/a\u003E, \u003Ca href=\u0022/docs-sales\u0022\u003ESales\u003C/a\u003E\u003C/li\u003E\n\u003C/ul\u003E","ParentCategoryId":"6abdec6c83d2816248229ea1","SeName":"getting-started-admin-tour","MetaKeywords":null,"MetaDescription":"Sign in to the GrandNode Admin panel and find your way around: the dashboard widgets, the side menu sections, the top bar and the Store and Vendor panels.","MetaTitle":null,"AllowComments":false,"Captcha":{"ReCaptchaChallengeField":null,"ReCaptchaResponseField":null,"ReCaptchaResponseValue":null,"ReCaptchaResponse":null},"RelatedArticles":[],"CategoryBreadcrumb":[{"Name":"Getting started","Description":null,"IsCurrent":false,"Children":null,"Parent":null,"SeName":"docs-getting-started","Id":"6abdec6c83d2816248229ea1","UserFields":[]}],"AddNewComment":{"CommentText":null,"DisplayCaptcha":false,"Id":null,"UserFields":[]},"Comments":[],"Id":"6abdec6c83d2816248229eab","UserFields":[]}