
1. GDPR compliance
Compliance with the GDPR is one of the most important parts of each online store. In the matter of GDPR, we need to cover a few different parts of the online store.
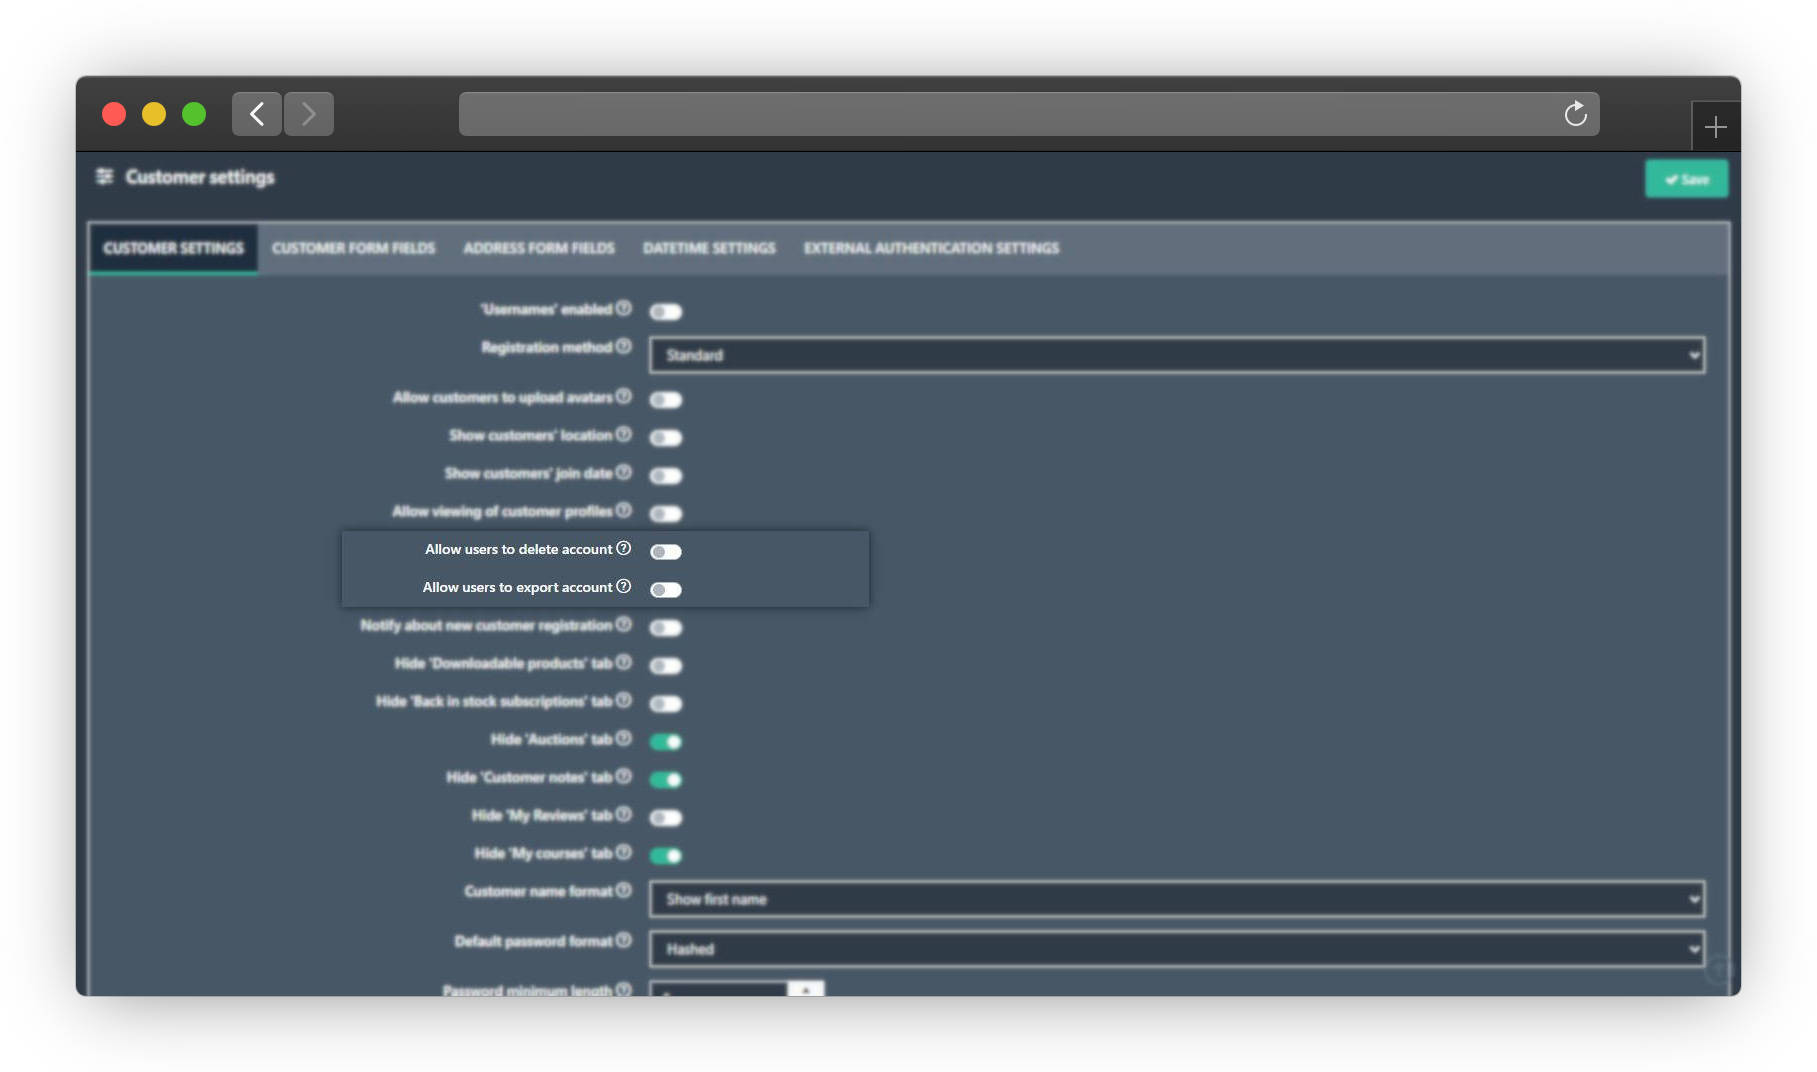
First of all, we need to give customers the possibility to export personal data and delete their accounts. You need to know that those settings are disabled by default.
To enable them, navigate to Admin panel -> Configuration -> Settings -> Customer settings.
2. Contact form Consent
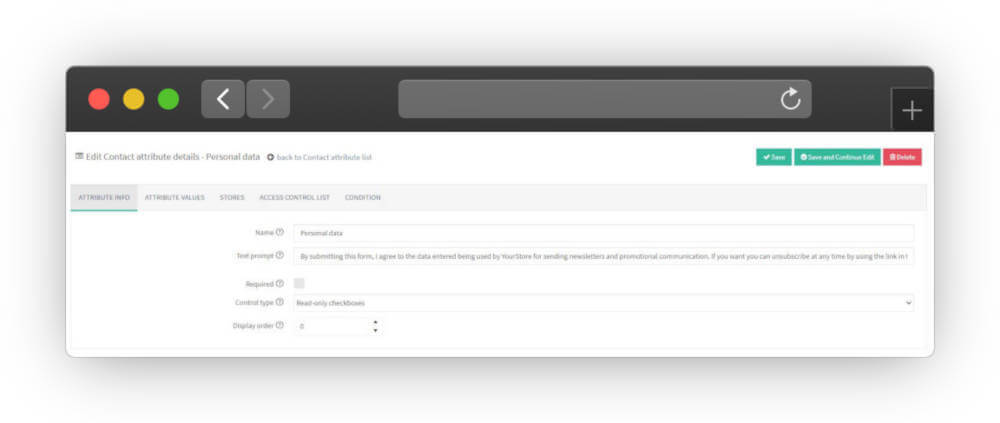
The second requirement was related to the contact form and any kind of place where you will collect e-mail addresses. To create this kind of consent, you need to create a contact attribute.
You can do it directly in your admin panel. Go to Admin panel -> Catalog -> Attributes -> Contact attributes. In my case, I've created a read-only checkbox, just to show information that customers' data will be managed by our company and they can unsubscribe any time. To create it, just press the Add new button, and fill the necessary fields.
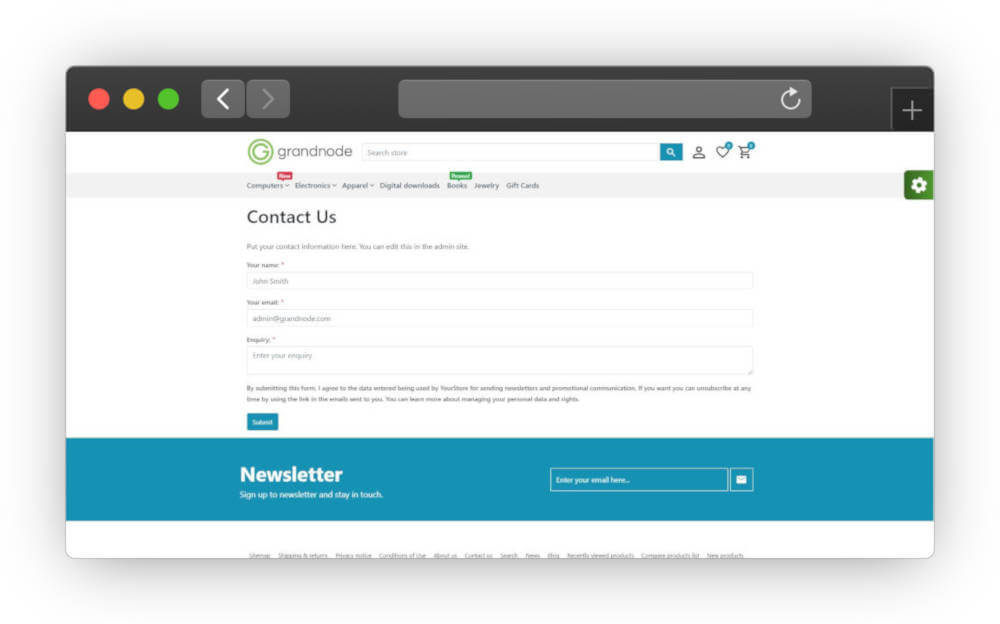
As a result, you will get a highlighted message, below the contact form, that your data will be kept by your company, etc.
My example is here:
3. Manage cookies preferences
This is the newest feature in GrandNode, it gives you the possibility to manage custom cookies in your store. Basically, out of the box, you were able to show simple Cookies notification bar. In GrandNode 4.80.0 it will be possible to manage cookies. Your customers will be able to disable Google Analytics, enable Facebook Pixel, etc.
How to create a custom cookie consent in your plugin?
To handle custom consents, we've created a new class that inherits from IConsentCookie.
Below you can find an example, how it should look at the end of work (it's an example taken from our Google Analytics widget):
using Grand.Services.Common;

using System.Threading.Tasks;


namespace Grand.Plugin.Widgets.GoogleAnalytics

{
    public class GoogleAnalyticsConsentCookie : IConsentCookie
    {
        private readonly GoogleAnalyticsEcommerceSettings _googleAnalyticsEcommerceSettings;

        public GoogleAnalyticsConsentCookie(GoogleAnalyticsEcommerceSettings googleAnalyticsEcommerceSettings)

                {

                    _googleAnalyticsEcommerceSettings = googleAnalyticsEcommerceSettings;

                }


                public string SystemName => GoogleAnalyticConst.ConsentCookieSystemName;


                public bool AllowToDisable => _googleAnalyticsEcommerceSettings.AllowToDisableConsentCookie;


                public bool? DefaultState => _googleAnalyticsEcommerceSettings.ConsentDefaultState;


                public int DisplayOrder => 10;


                public Task FullDescription()

                {

                        return Task.FromResult(_googleAnalyticsEcommerceSettings.ConsentDescription);

                }


                public Task Name()

                {

                        return Task.FromResult(_googleAnalyticsEcommerceSettings.ConsentName);

                }
    }

}
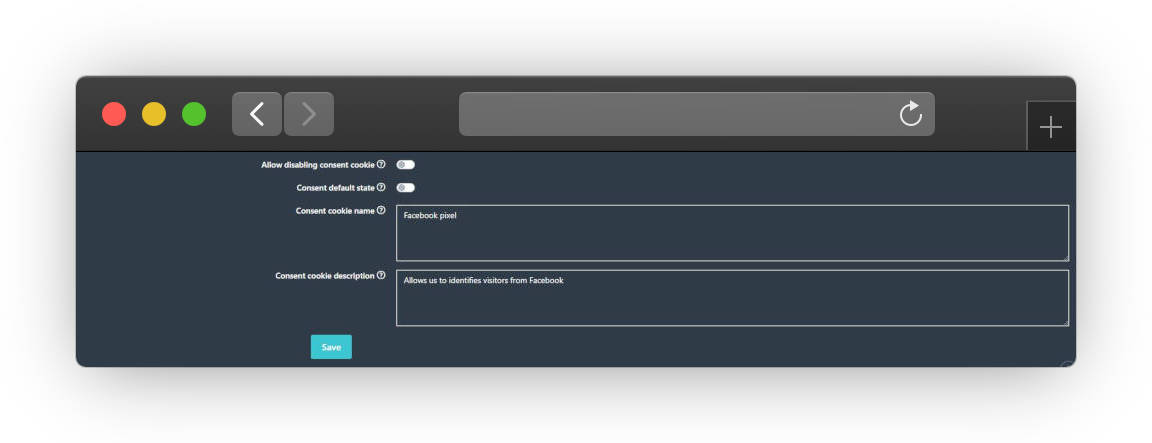
Below you can find the description of each part of the file. To create such class, you need to provide some required fields:
SystemName - It's a system name of the cookie.
AllowToDisable - You can decide if the customer can disable this cookie or not.
DefaultState - This one is responsible for the default state of the setting. You can decide if it should be enabled or disabled by default.
DisplayOrder - It's a display order of the cookie consent
FullDescription - It's a full description of the cookie, where you can describe why it's used.
Name - it's a simple name of the cookie, this one, and FullDescription field is presented on the screenshot below.
Above configured fields have to be configured in Settings. They should be configurable from admin panel, so you need to open the YourPluginSettings.cs and add following thing:
    public bool AllowToDisableConsentCookie { get; set; }

    public bool ConsentDefaultState { get; set; }

    public string ConsentName { get; set; }

    public string ConsentDescription { get; set; }
Don't forget to add new settings to the ConfigurationModel.
    [GrandResourceDisplayName("Plugins.Widgets.FacebookPixel.AllowToDisableConsentCookie")]

    public bool AllowToDisableConsentCookie { get; set; }

    public bool AllowToDisableConsentCookie_OverrideForStore { get; set; }


    [GrandResourceDisplayName("Plugins.Widgets.FacebookPixel.ConsentDefaultState")]

    public bool ConsentDefaultState { get; set; }

    public bool ConsentDefaultState_OverrideForStore { get; set; }


    [GrandResourceDisplayName("Plugins.Widgets.FacebookPixel.ConsentName")]

    public string ConsentName { get; set; }

    public bool ConsentName_OverrideForStore { get; set; }


    [GrandResourceDisplayName("Plugins.Widgets.FacebookPixel.ConsentDescription")]

    public string ConsentDescription { get; set; }

    public bool ConsentDescription_OverrideForStore { get; set; }
Finally, you need to add new fields to the Configuration cshtml file.
As a result, finally, you should see the following window during the plugin configuration:
If you want, please check the existing plugins, for example, Google Analytics:
https://github.com/grandnode/grandnode/tree/develop/Plugins/Grand.Plugin.Widgets.GoogleAnalytics
It has implemented all of the changes. After checking, it will be easier for you to implement changes in your plugins.