
In this short article we will look at our newest feature, which comes with GrandNode 3.90 - Interactive Forms. If you noticed, from the version 3.80 we highly focused on Real Time Marketing, Big Data and conversion. We want to create software which will be fully usable and technical advanced, without using third part tools and softwares.
For this purpose, we've created "Customer Actions". This feature is used to capture customer action and make a specified reaction. What can be actions? The simplest, and the most popular action made by customer is adding product to the shopping cart. When somebody add specified product to the cart from the category X, he could be interested in product from category Y related to products from category X. How we can react in this moment? The simplest idea is to show banner with information about product, we can also send e-mail to the customer or assign to him customer tag or customer role, which we can later use to offer recommended products.
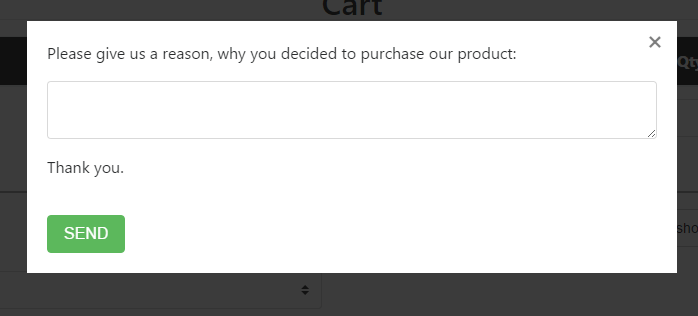
The latest and the newest type of reaction is a Interactive Form. What's that? It's personalized form, created in admin panel, which appear to customer as a popup.
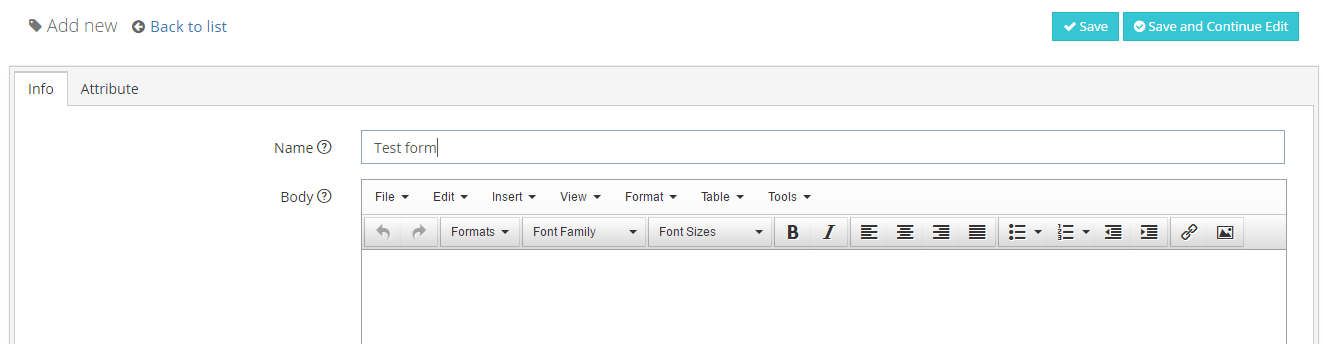
Creation of interactive form we start from its name and begining of body. It's necessary because we won't be able to save changes if we leave this fields empty.
Save changes by clicking "Save and continue edit" and go to "Attribute" tab. Click "Add new" button. We will see new, short form where we can add fields of our interactive forms.
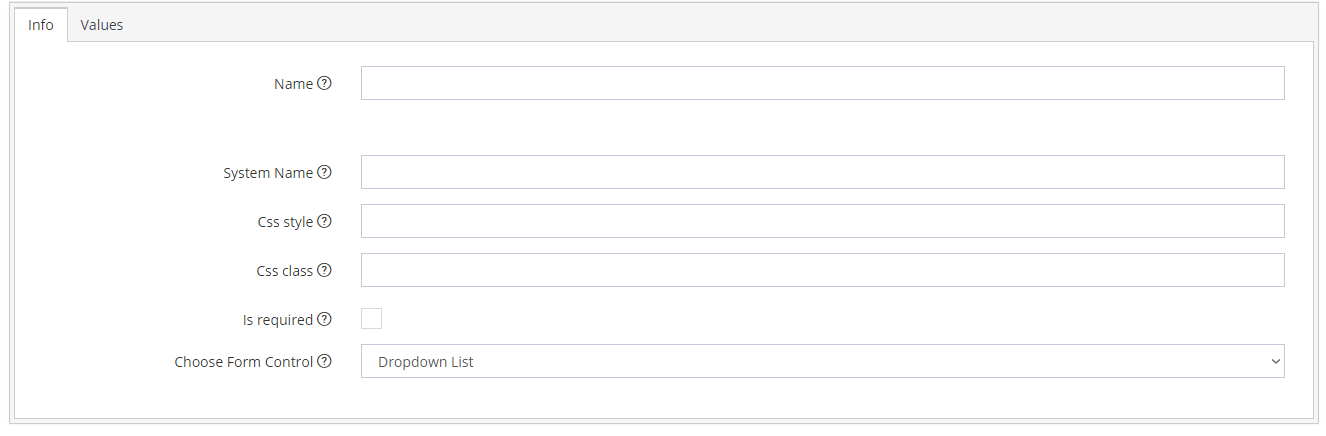
Name - it's nothing special than name of our field. If we want to receive reason of purchase, you can enter "Reason" in this field. System name will be the name of token with our field.
In the CSS Style and CSS Class field we can personalize fields. Change its formatting by entering inline styles or enter here existing classess used in css file.
Check "Is required" box if you want this field to be required to fill. "Choose form control" is used to choose field form. In the our case, described above we will choose "Multiline textbox".
After choosing this type, we will see new fields to fill.
Regex expression is used to create validation. If we leave it empty, customer will be able to enter anything he want here. We can also specify min and max lenght of entered text. The last field is the "Default value". We can enter here default text which will be shown in the created field. Save changes.
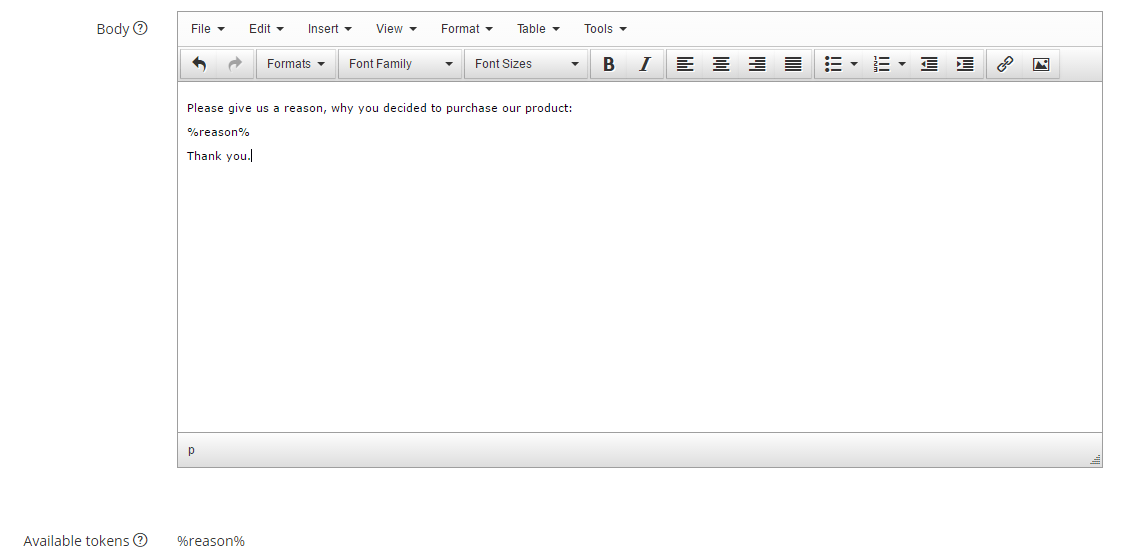
After save changes we will see new section of the screen. In the "Available tokens" section we will see token responsible for our field in form. Now, to the "Body" section enter token - %reason% as shown below.
Please Save changes, then go to the "Customer Actions" tab and create new action. Choose action - "Add to cart".
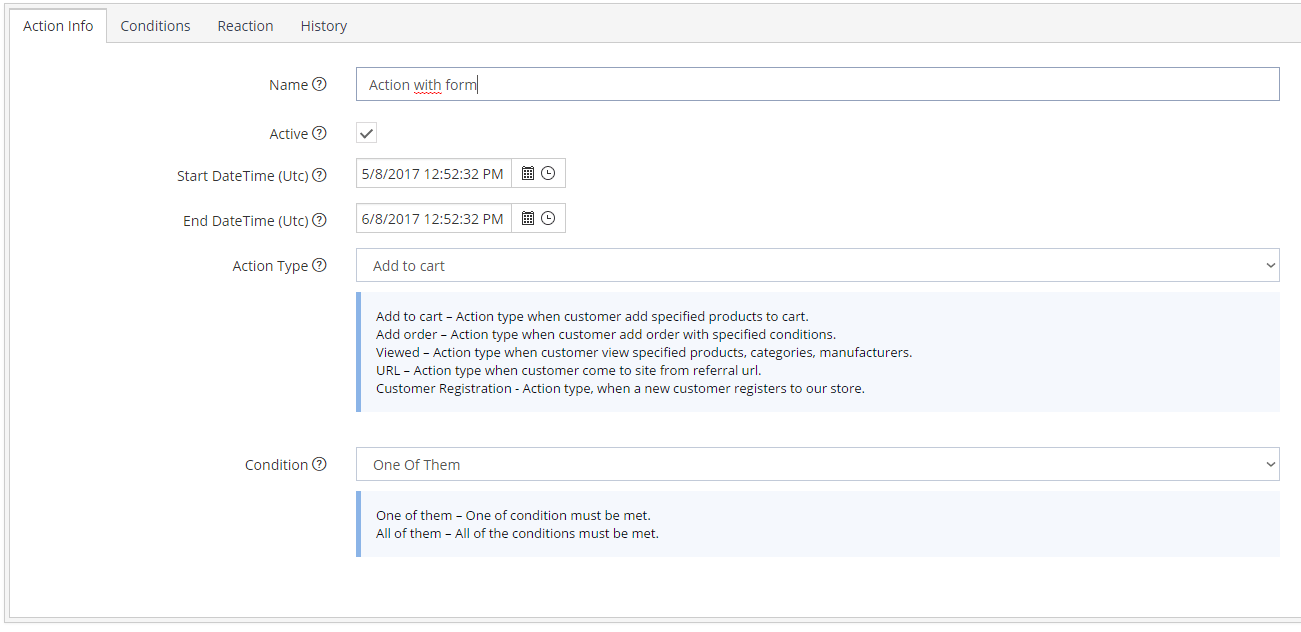
Before saving, remember to go to the "Reaction" tab and choose Interactive form as a "Reaction Type" and choose your created form. Next step is to create new Condition in "Conditions" tab. Please choose "Product" and in the "Products" tab select interesting you product. Now, please enter to your store and add specified product to the cart. You will see your Interactive Form.
Leave your comment