
First step - Enable customer actions
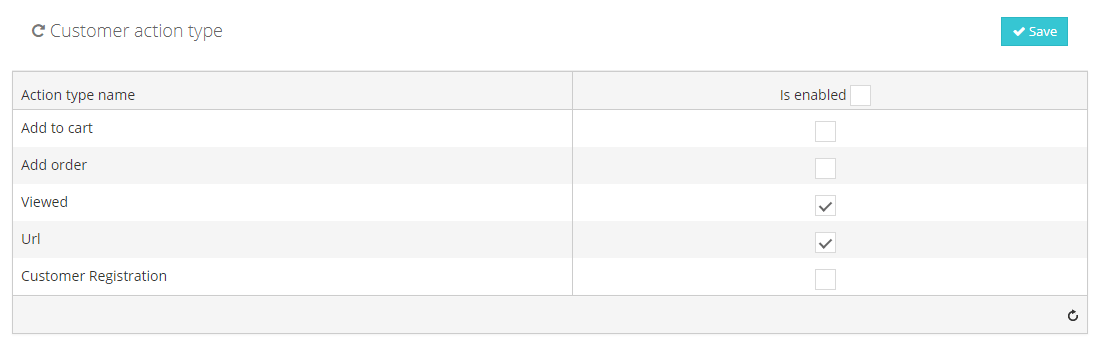
If we want to use this feature, you should enable it. Please go to Admin panel -> Promotions -> Customer Action Type. Now you should mark the checkbox. In this case, we have to check the "URL" field. You can see this setting on the screen below:
Create new Customer tag - Facebook
To assign customer tag, you need to have at least one existing. Go to Admin Panel -> Customers -> Customer Tags -> Add new. You will see following screen:
 Name - Basically it's your tag. I used "facebook", you will see it in the next part of this article. Save changes and go to the next step.
Expose them fast and easy!
If we have enabled customer action type - "URL", we have to create specified customer action. Before creating, you should know what you want to achieve. In this case, we want to distinguish customers coming from Facebook without third part tools. Let's go to Admin Panel -> Promotion -> Customer Actions -> Add new. You will see following page:
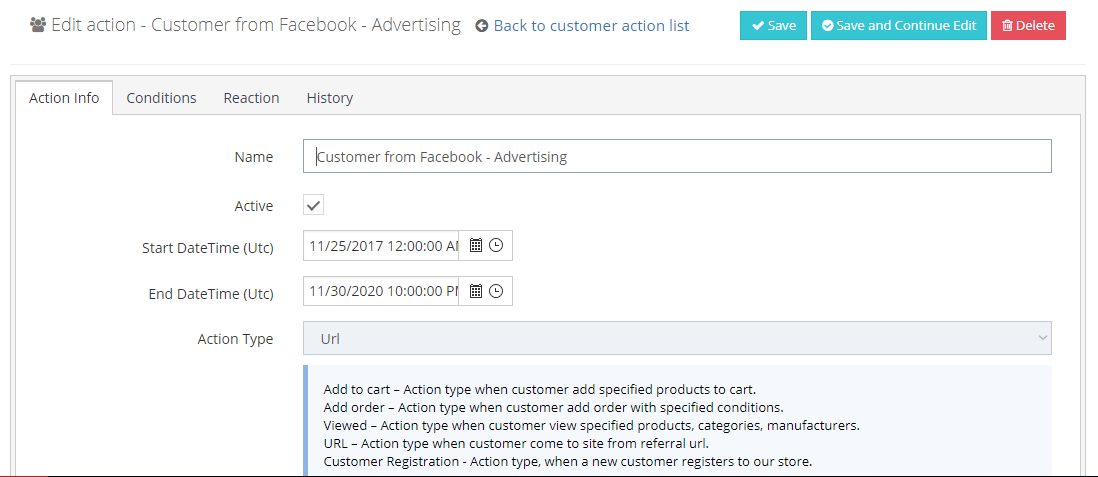
Name - Enter the name of your customer action. I entered "Customer from Facebook - Advertising".
Active - You can specify if this action should be active or not.
Start/End Date - You can specify a time periods when the action should be active.
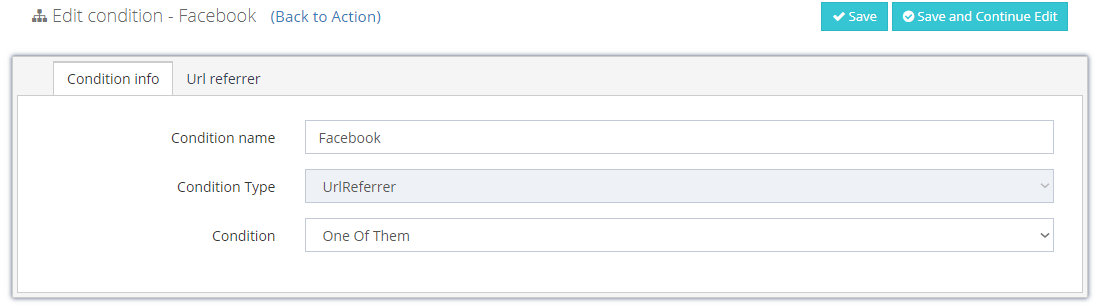
Action type - Choose URL - description of each type you can find below dropdown.
Condition - One of them.
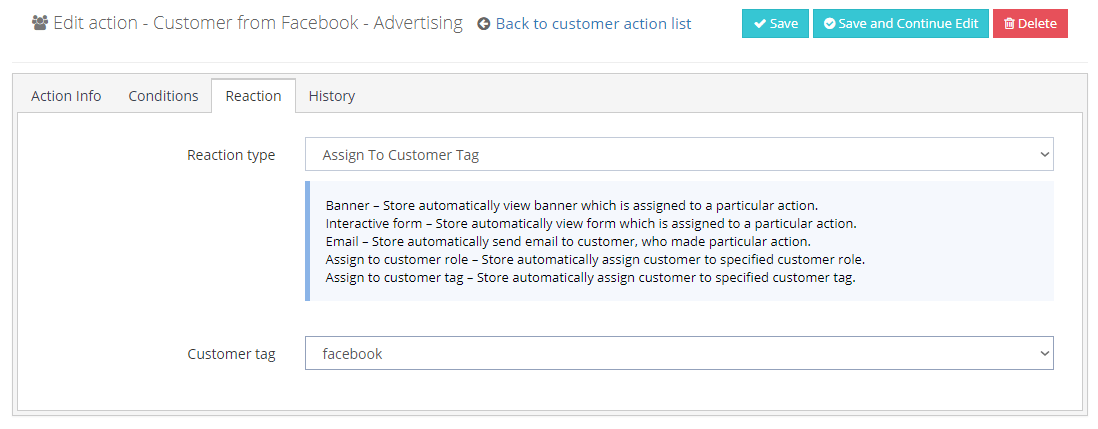
Now go to Reaction tab. Here we can specify what GrandNode should do, when users from Facebook will enter your store. In this case we will choose "Assign to customer tag" and in the "Customer tag" field, you should choose tag which you created before - shown on screen below.
 Now press the "Save changes" button.
The last step is to create a condition. Go to Conditions tab and press the Add new button. Please fill the required fields:
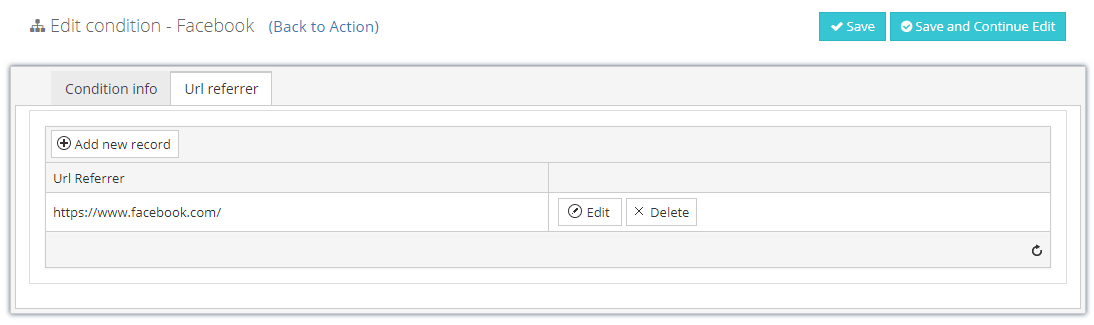
If you selected "UrlReferrer" condition type, you will see new tab. Open it and Add new record, as it's presented on the screen below:
Save changes and that's it!
Benefits coming from assigning customer tags
1. You can select suggested products to specified customer tag. You can do it in Admin Panel -> Customers -> Customer Tags.
2. When you will create a new mailing campaign in GrandNode, marketing automation system can automatically segment your customers and send message only to customers who have specified tag.
Did you create this type of customer action? How it works? Let's share your experience with us!
Leave your comment