

In this tutorial, I will show you how to create few types of reservation products. As you know, from the GrandNode 4.10 you are able to create a reservation product. You can specify the reservation interval, quantity and generate availability calendar. I will show you how to create a functional products in GrandNode in a minutes.
The most common type of reservation - 1 night in a cottage house
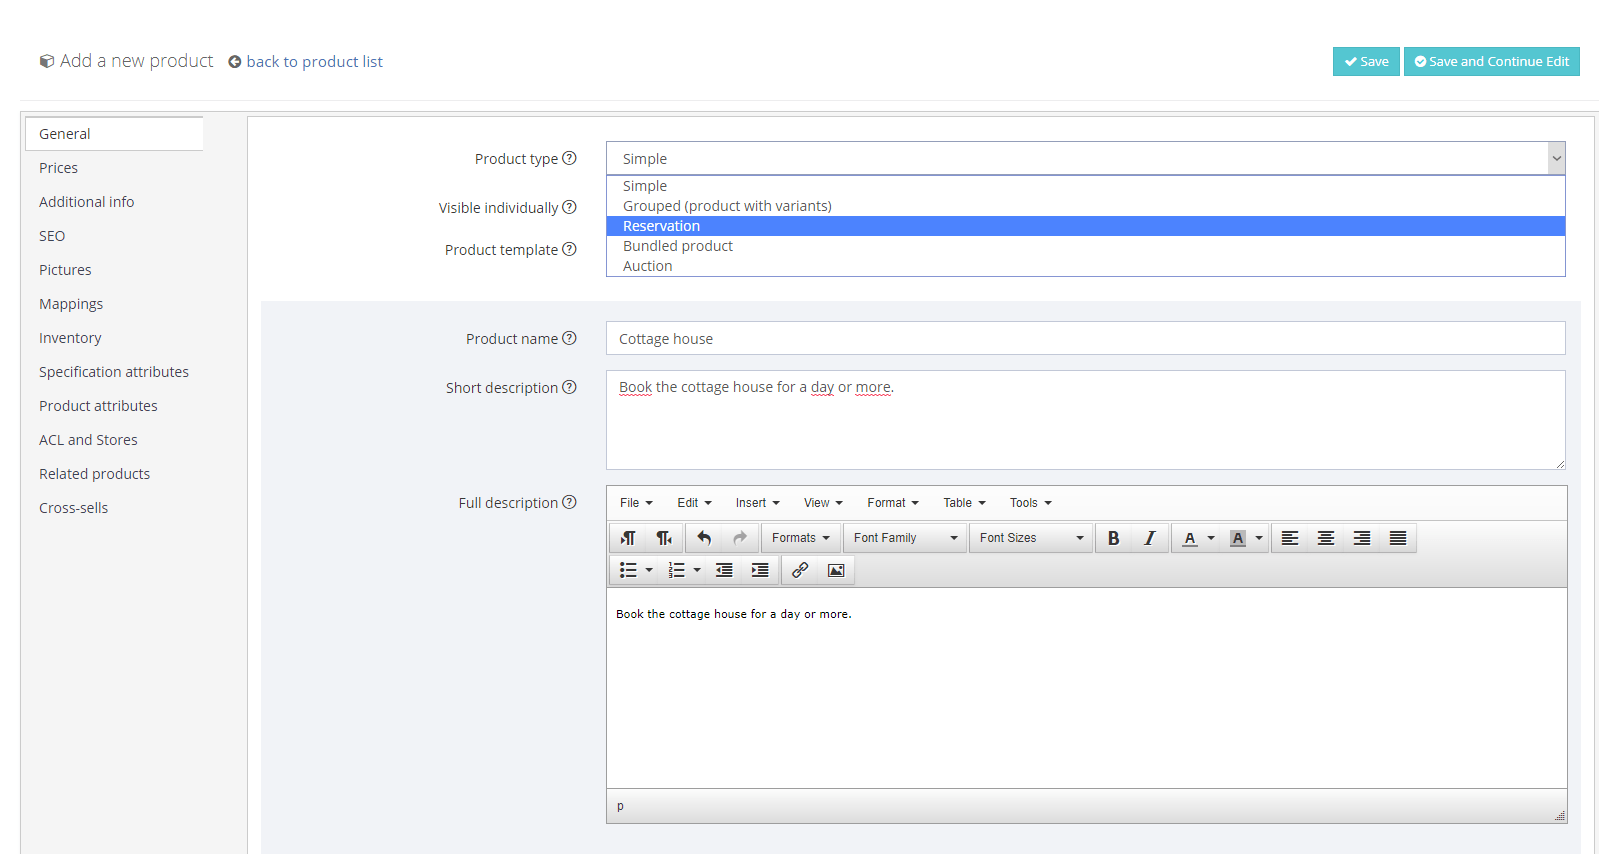
In this product, we want to offer a cottage house reservation. In the standard way, we have a hotel night and we will use it in this reservation. Open the admin panel and go to Catalog -> Products -> Add new. We will see the following screen. Change the product type from Simple to Reservation, fill the Product name, short and full description and "Save changes and continue edit".
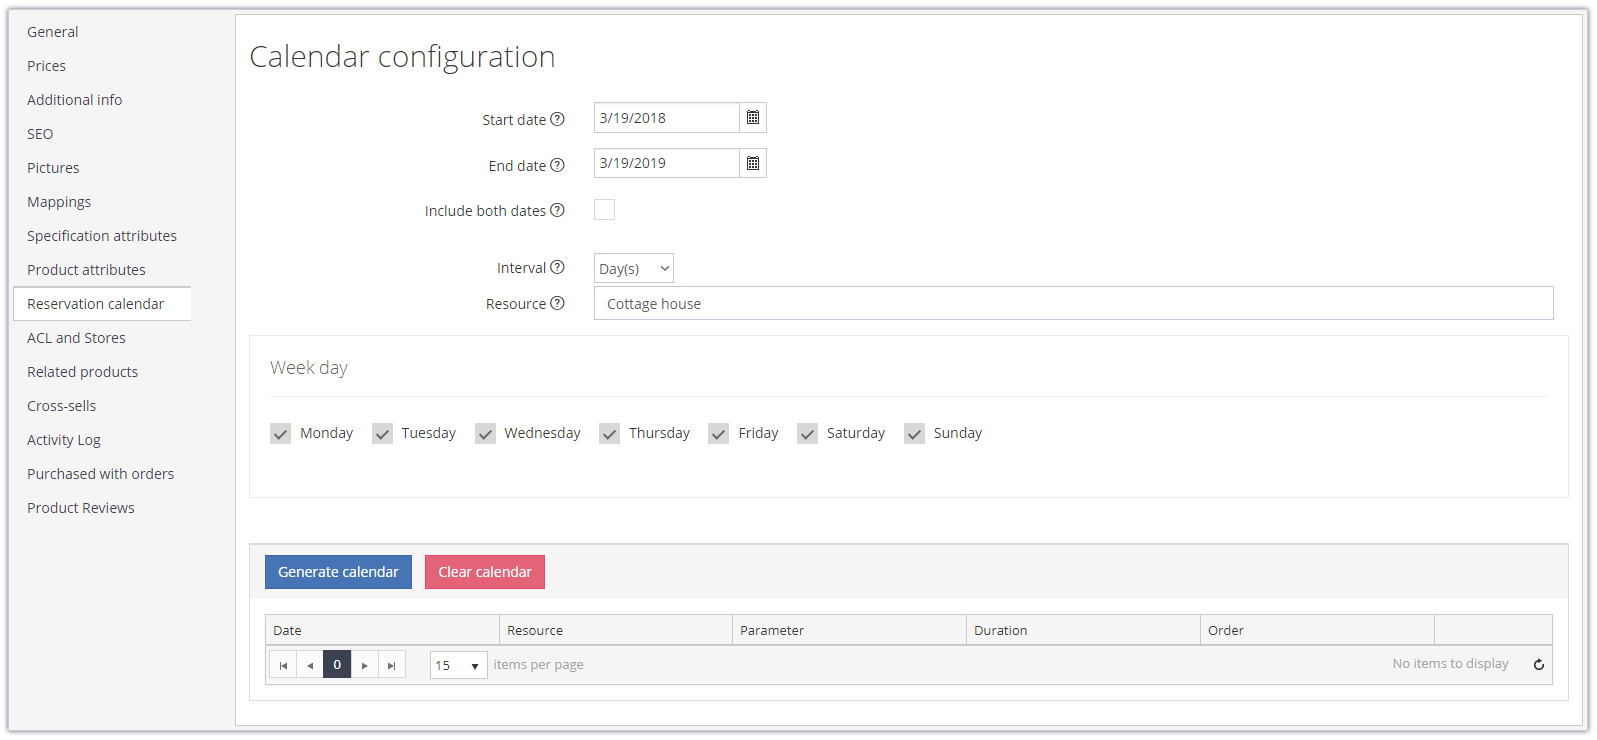
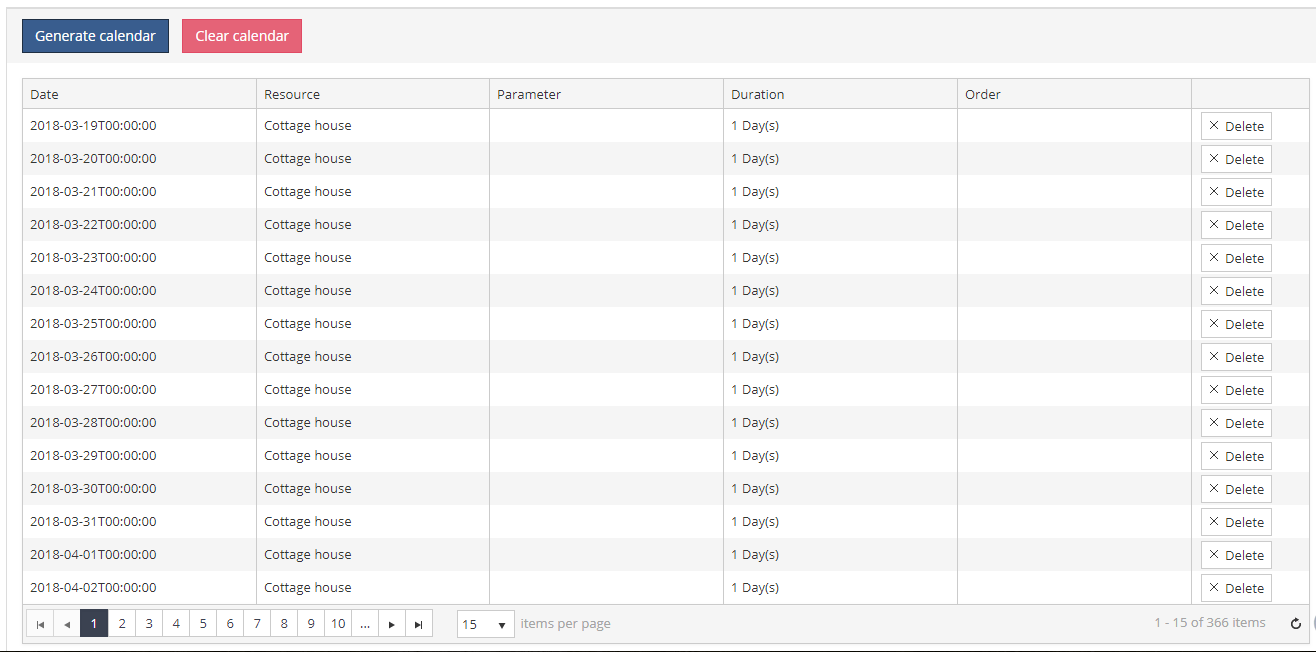
In the next step we need to generate the availability calendar. To perform that action, please go to "Reservation calendar" tab. In my example, I want to offer cottage house from 19th march 2018 to 19th march 2019 so I changed the Start and End dates. As we offer daily reservation with hotel night, choose the "Day(s)" interval and fill the Resource field. I named it "Cottage house", you can use anything. Choose the days, when your cottage house will be available to rent. In my example I want to offer it every day, so I checked all days. Now, press the "Generate calendar" button. It will generate all available terms of reservation.
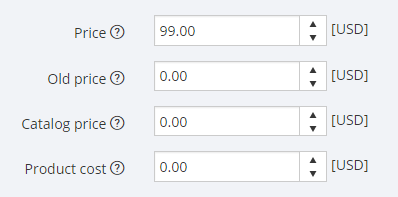
In the next step, we need to set the reservation price. Go to "Prices" tab. In my example, I will set 99$ for one day. After that save changes. That's all. You've created a reservation product.
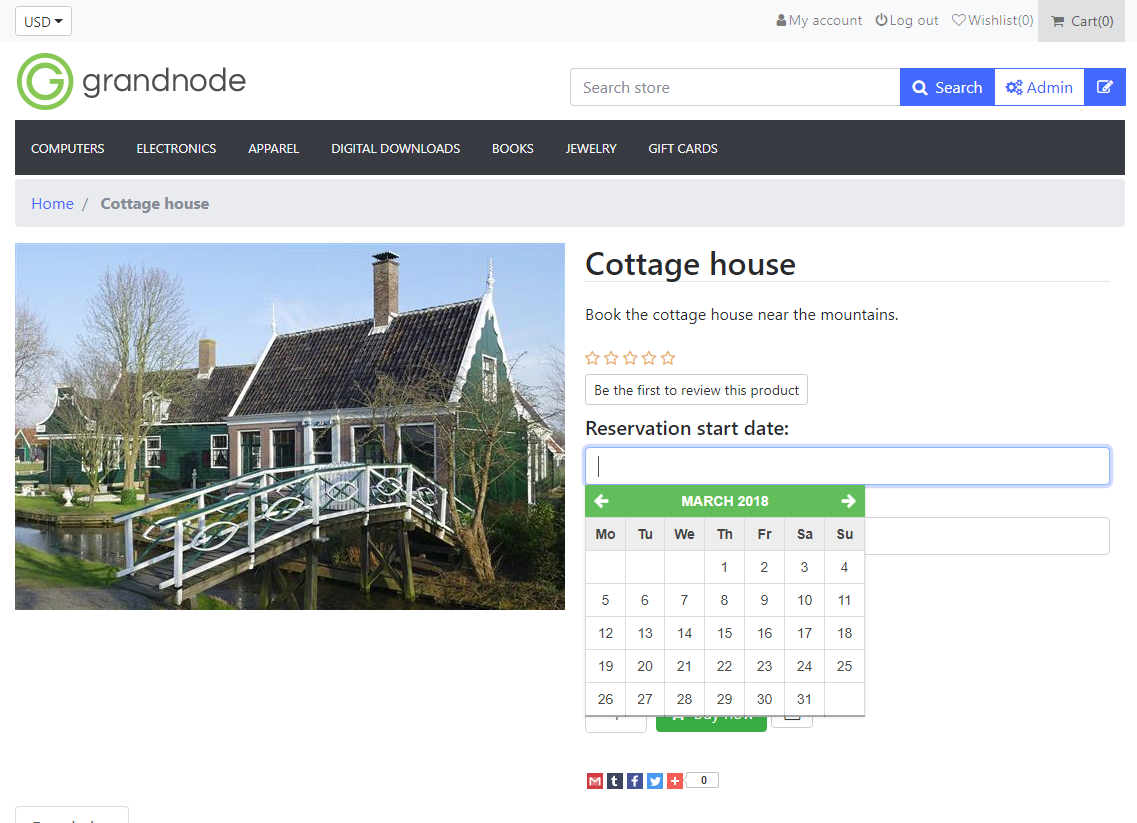
Now, open your store. We will look at the frontend, how it works.
As you can see, on the product page we have two, new fields. "Reservation start date" and "Reservation end date". Please choose the reservation start date, click the empty text box, you will get a calendar with free days. Cho
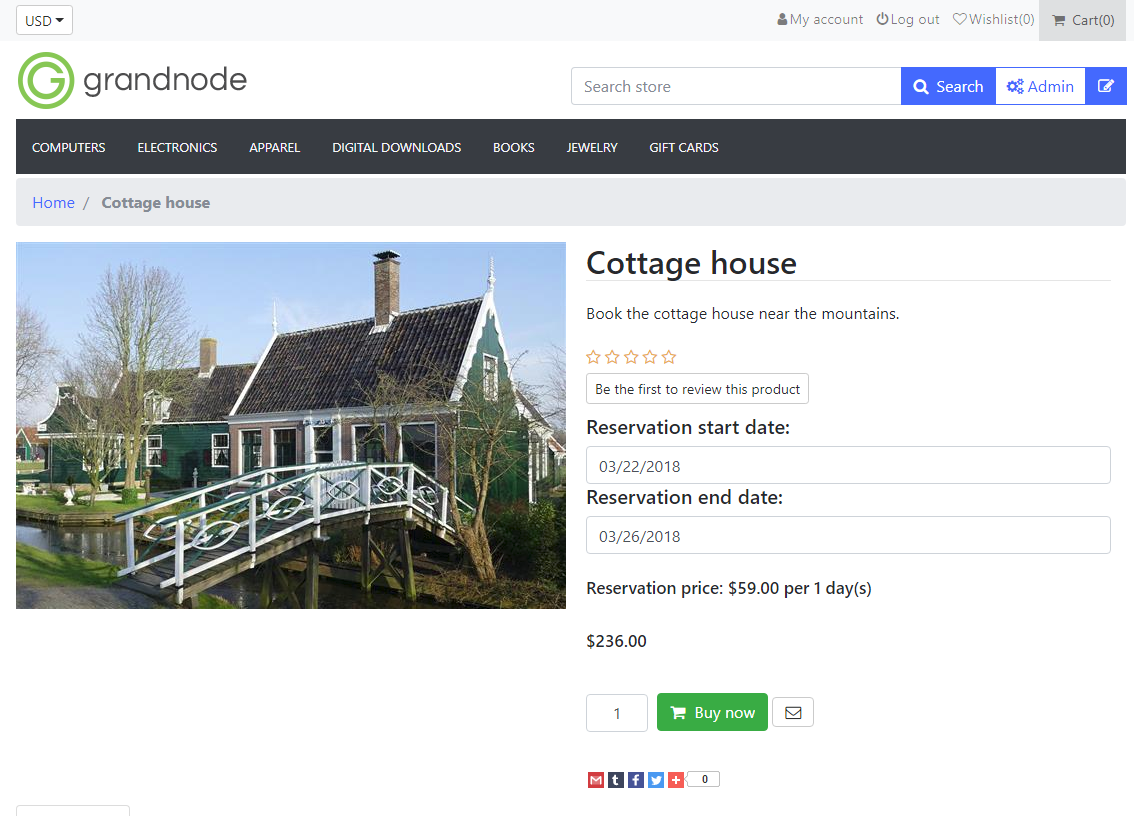
Now, let's click the Buy now button. It's very simple process. Just choose the reservation time and order it. You will see the following screen:
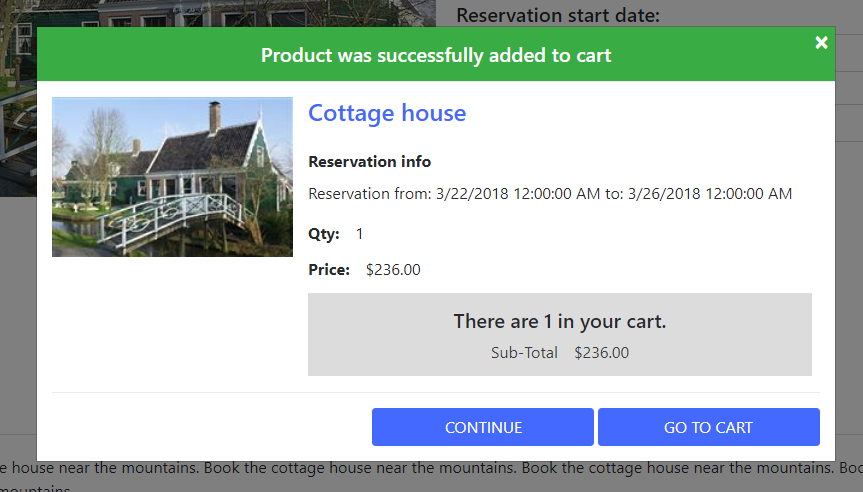
In the confirmation screen you will see the reservation time and price for the whole reservation. In my example it will be 59$ per one day.
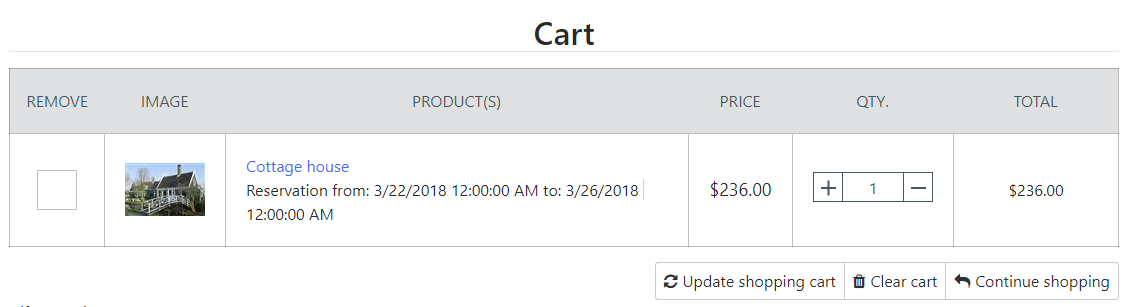
This information will be visible also in the shopping cart, example below:
What about online course or webinar? New type of product reservation
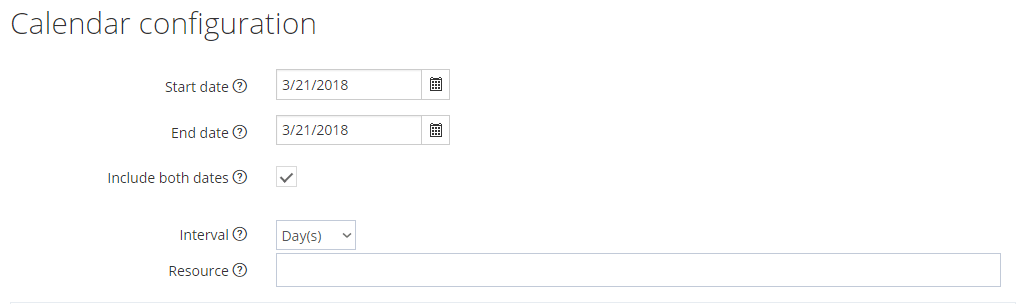
First type of product reservation is clear and already created. Now, imagine that you want to create a webinar, which will last two hours. Go to product creation, change the product type from simple to reservation, then name it and go to reservation calendar tab, as before.

In my example, I want to offer two hour online webinar. It's available from 26th march to 30th march. I'm also available only from 8 a.m. to 4 p.m., to specify that, I need to change the "From hour" and "to hour" fields. As it's on the screen above. Webinar will last two hour, so I need to change the Interval type to "Hour(s)" and enter "2". Press the "Generate calendar" button and that's all. Product is ready! Now go to your store.
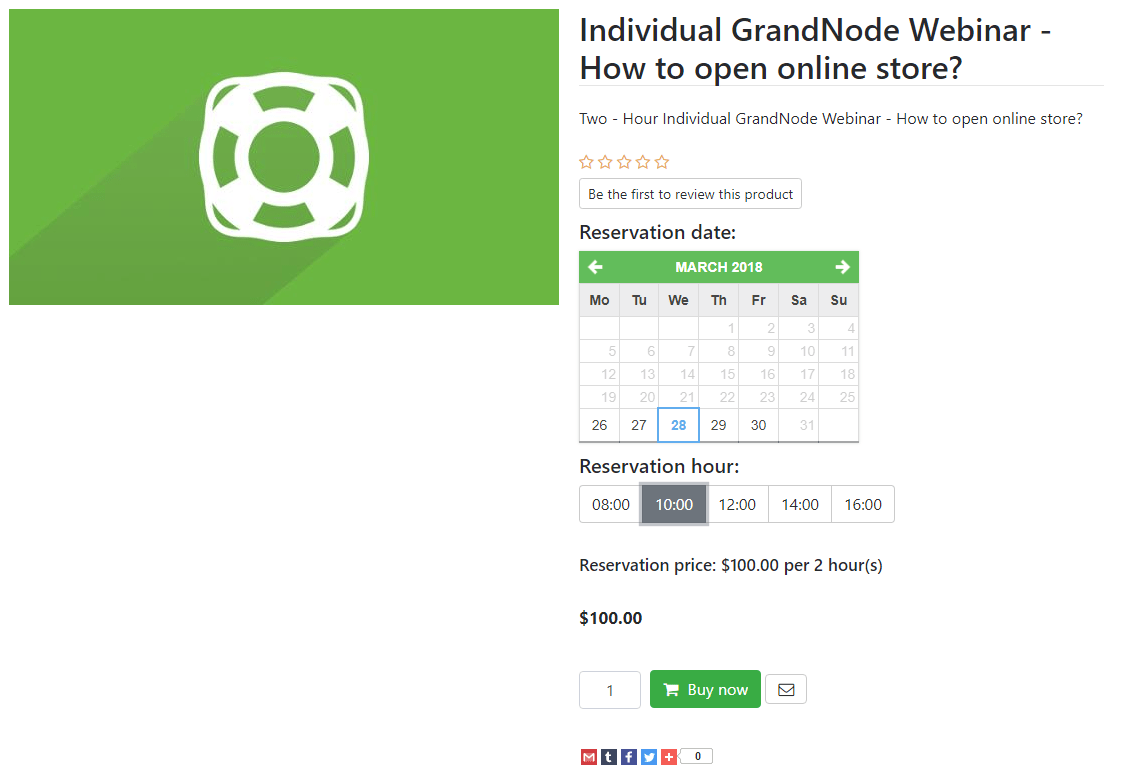
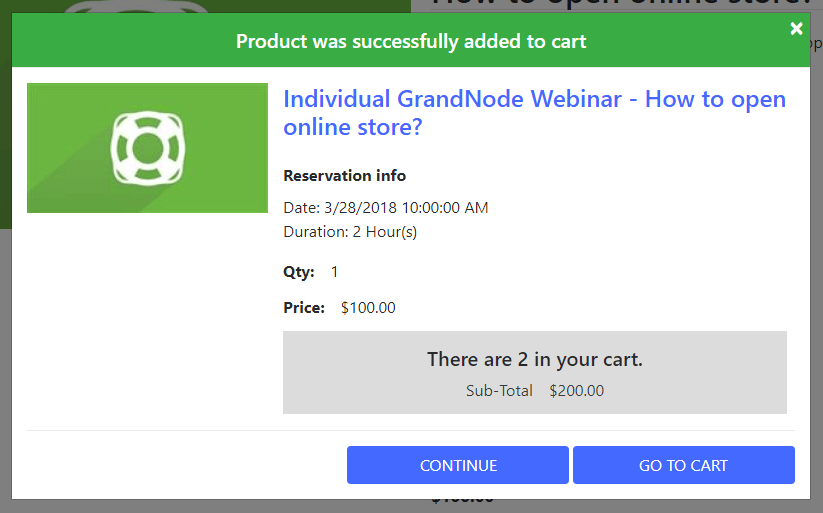
Do you see the difference? We see only 5 available hours and just 5 available days, from Monday to Friday. Now choose the preffered date and reserve it. You will see the confirmation pop up with selected webinar.
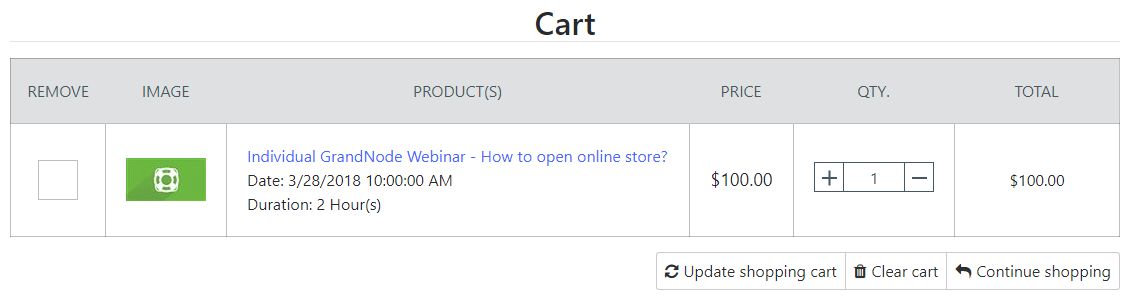
The difference will be visible also in the shopping cart. We will see the duration of webinar and its date.
Offering a weekend course, how to achieve the daily reservation without hotel night?
If you want to offer a weekend course and configure the product like above, it will be hard to reserve it without problems. In this example we will use a course, which will be on Friday, Saturday and Sunday. So, if somebody will pay for three days, he should book the three days, from friday morning to friday evening, saturday morning to saturday evening and sunday morning to sunday evening. In this case, we should use "Include both dates" setting, which is available in the product details page. If you don't use this setting, you will give possibility to reserve two "days" - from friday to saturday and from saturday to sunday, what is wrong.
Look at the screen below.
Rest part of product creation is the same like before. Enter the price, upload product picture, generate reservations calendar.
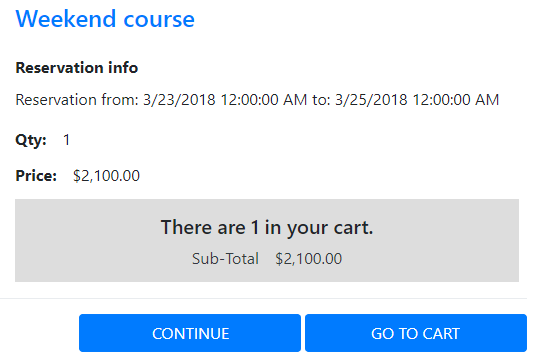
Now, go to your store, open the created product and book it. I've booked the online course from friday to sunday. Then I've paid this order. Before purchasing, look at the confirmation screen. My course costs 700$ per day and I should pay 2100$ for three days of course. And in the confirmation screen is the correct price.
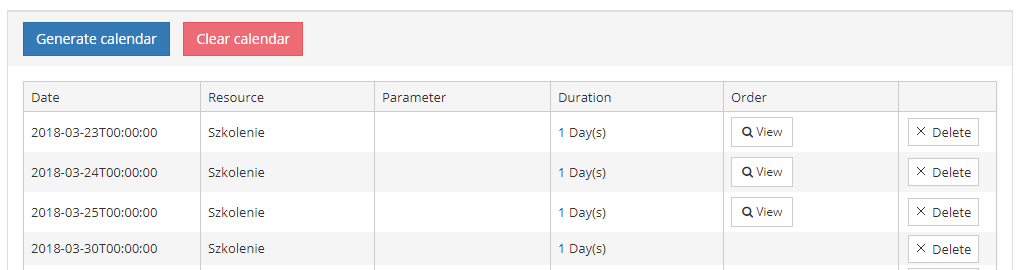
I've completed the purchase process and went back to admin panel. If you look at the reservation calendar, you will see that I booked exactly three days.
What will happen if you want to book an unavailable term? You will see the following popup:

Comments
Dragan
Patryk