
Nowadays people try to find better and better tools and solutions to increase sales, conversion and number of customers. Each tool consumes the resources of your store. First, it consumes money, because mostly you will use the SaaS Solutions, ready to implement in your store. Second, it consumes your resources, each extra tool added to your store slows it down. In recent e-commerce, when the speed matters, slow stores are just ignored by customers. Maybe it works, maybe it improves your store, but come on. We have XXI century and advanced ecommerce software should meet all of your requirements without implementing additional tools. So it’s also should cover features to increase sales. Now it’s not a problem to open store, list products and sell them. E-commerce software should cover much more than the basics.
We know that and that’s why we created GrandNode. It’s not a typical e-commerce software, it’s a powerful solution with huge possibilities. One of it will be described in the following article. In this tutorial we will create the „Call me” Popup, which is very popular in the e-commerce industry. To create it, we will use the Interactive form feature, which is available in GrandNode out of the box.
Interactive form, it’s a type of reaction, when customers made particular thing in your store. For example you can show them „Call me” popup when they are on the homepage or when they add product to cart or register. It’s up to you.
How to create popup with form in GrandNode?
First of all to create the interactive form we need to login to admin panel. Please go to Admin panel -> Promotions -> Interactive form and press the Add new button, in the top right side of the page.

You will see the empty form to fill. It’s very simple. You need to think about your requirements. I will show you how I made my „Call me” popup.
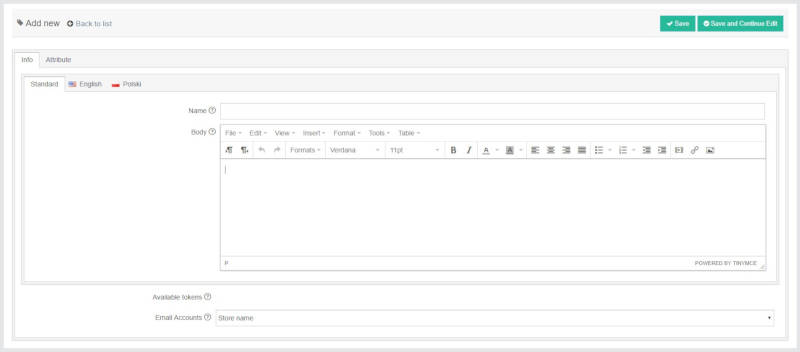
Please enter the Name of the form. I will name it „Call me popup”, but what you write there is totally up to you.
In the Body field, we will create the whole structure of our pop up. It requires a bit of HTML/CSS knowledge, but I will give you ready to use example here. In my case, I will create simple box, divided into two parts. First just with text and the second with phone number input. I’ve used following code:
<div class="callme-popup col-12">
     <div class="left-sidebar col-4">
         <p>Fill the form <br>
         & wait for the call!</p>
     </div>
     <div class="right-sidebar text-center p-5 col-8">
         <h3 class="callme-title">We will call back in a few minutes!</h3>
         <p>Leave us phone number here:</p>
     </div>
 </div>
Remember to paste it into Source code section, because we want to use HTML tags. I’ve used a Bootstrap classes also, but it’s totally up to you. You can use the clean CSS.
Save changes. In the TinyMCE editor we won’t see any styling, because it doesn’t use the public classes.
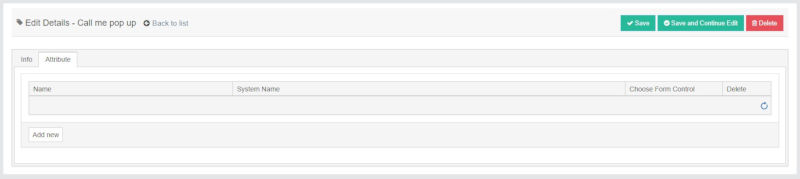
Now we need to create the field for the phone number. We will use the „Textbox attribute”. Go to the „Attributes” tab and press the Add new button.
In my case I called it – Phone number, system name the same (System name will be used in the token, which you will add to the Form body. CSS Style I left empty, because I prefer to use the CSS Class: callme-input. I will style it in the external stylesheet file. We need to select the „Textbox” form control. You will see few new fields.
Here is the regex for the phone number: ^[+]*[(]{0,1}[0-9]{1,4}[)]{0,1}[-\s\./0-9]*$. This disallow to enter numbers, so you will be sure that users enter only phone numbers. You can fill also the validation min and max length. After that, save changes and go back to the form. We will be able to insert the created attribute. Just copy the %phonenumber% to correct place. In my case, I will add it in the end of the right side of the box. Right after the %phonenumber% we should add the Send and Error message tokens. to add them just copy and paste the %sendbutton% and %errormessage% tokens.
Save changes. Now we have to make some improvements in our CSS file. Open it. If you use the DefaultClean theme, go to GrandNode -> Themes -> DefaultClean -> Content -> CSS -> style.css.
We have to add styling for the classes that we used in the body of our interactive form. I will paste the whole css that I added to it.
 /*Call me pop up*/
 .callme-popup {
     border-radius: 7px;
     -webkit-box-shadow: 10px10px26px-9pxrgba(0,0,0,0.75);
     -moz-box-shadow: 10px10px26px-9pxrgba(0,0,0,0.75);
     box-shadow: 10px10px26px-9pxrgba(0,0,0,0.75);
     background-color: #ffffff;
 }
 .left-sidebar {
     background-color: #0091b5;
     color: #ffffff;
     align-items: center;
     text-align: center;
     display: flex;
 }
 .callme-title {
     color: #0091b5;
 }
 .callme-input {
     border: 3pxsolid#0091b5;
 }
 .interactive-form-button {
     background-color: #fff;
     color: #0091b5;
     border: 3pxsolid#0091b5;
     border-radius: 0;
     text-transform: uppercase;
 }
What's important, we need to change the background-color property of #modal_action_form from #ffffff to transparent.
Save it and go to Customer Actions section. We need to specify when this Interactive Form should appear.
In my case, I want to show it to everyone without any specified requirement. So, next step is to create customer action. Please click the Add new button. Fill the form, below you can find my example:
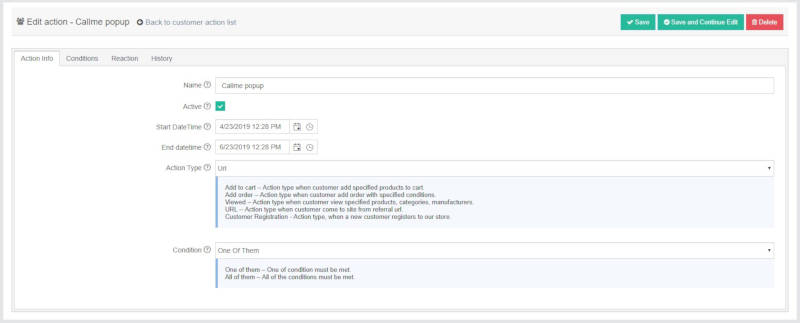
Please remember to change the reaction type before save. We need to choose the Interactive form as a Reaction type and select our form from the list. In my case, when I saved the customer action, banner will show to everyone.
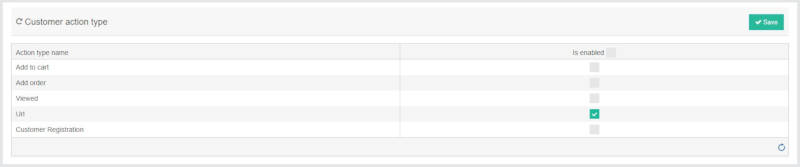
The last step is to enable action type. Go to Promotions -> Customer Action type and enable the URL action type.
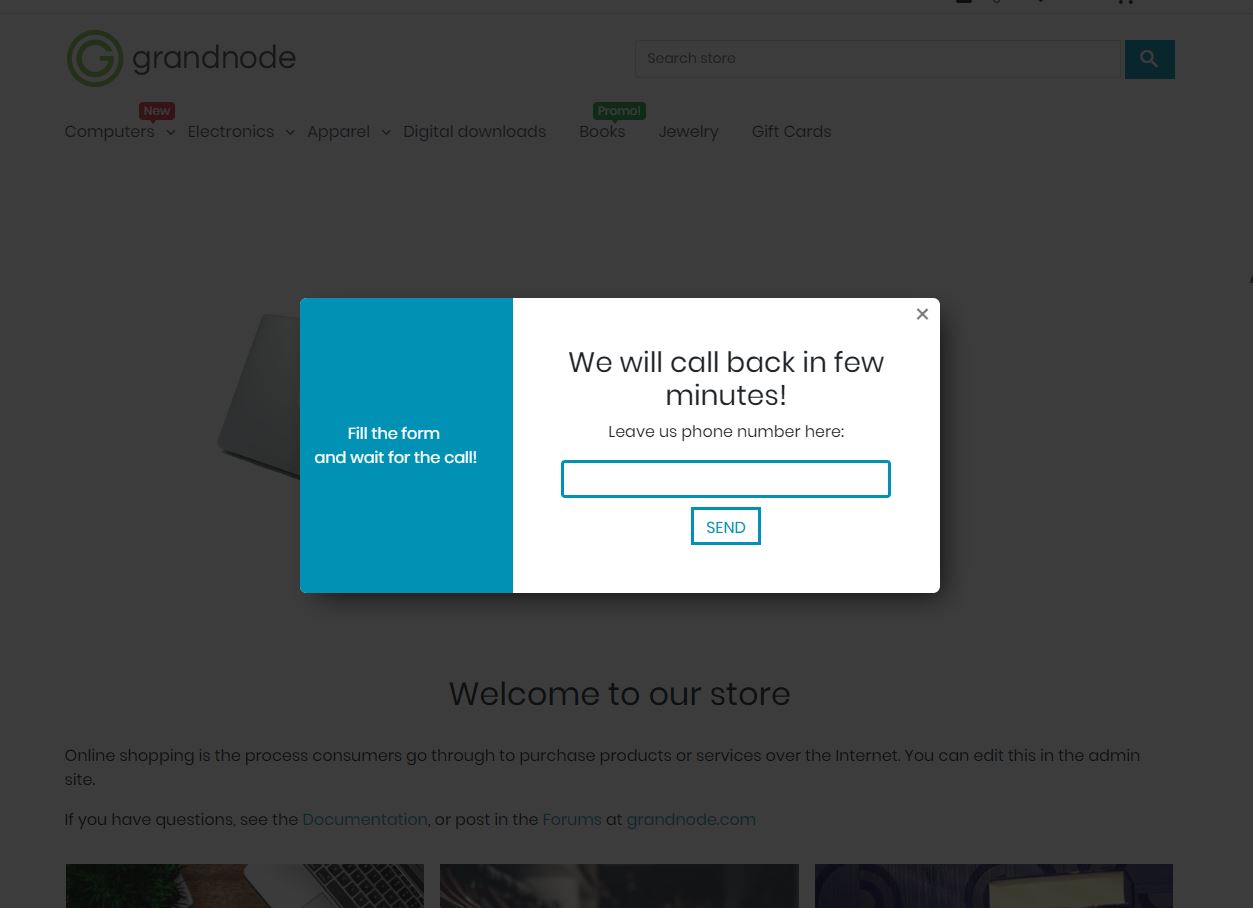
Finally, when your customer visit any page in your store, he will see following popup:
Comments
Juan Andrés
Tomasz
When a pop-up is displayed, and the customer will add a phone number, clicking send button, a message is generated. Have you looked at the Message Queue? If done everything correctly, you should be able to see a mail with the phone number of the customer.