

In general, courses are new feature in GrandNode 4.60. With them you are able to create a hidden content, which will be available after purchasing specified product. What does it mean? You can easily create a portal like Coursera or Udemy without external plugins. In this tutorial I will fully base on Udemy.com.
Let's start from the beginning. First of all you should create products that your customers will be able to purchase. After successful payment, they will receive an access to the course. For the tutorial purposes we will create some new products. I will work on ready database of products and categories, but you should navigate to Admin panel -> Catalog -> Products -> Add new. Add as many products as you want.
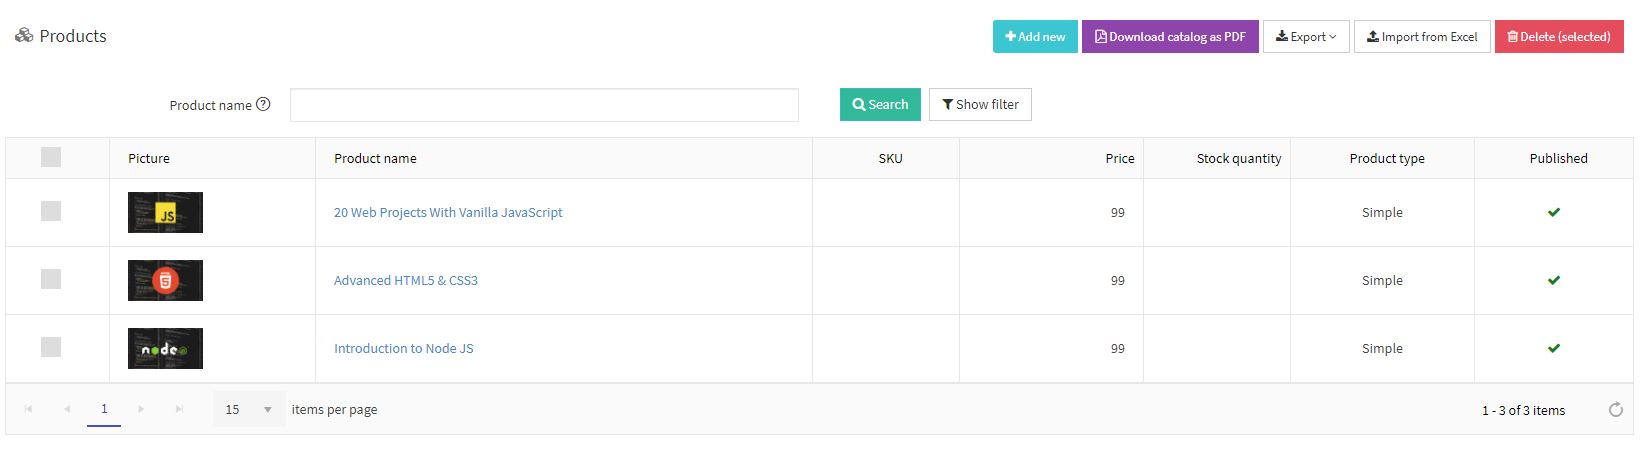
I've created following things:
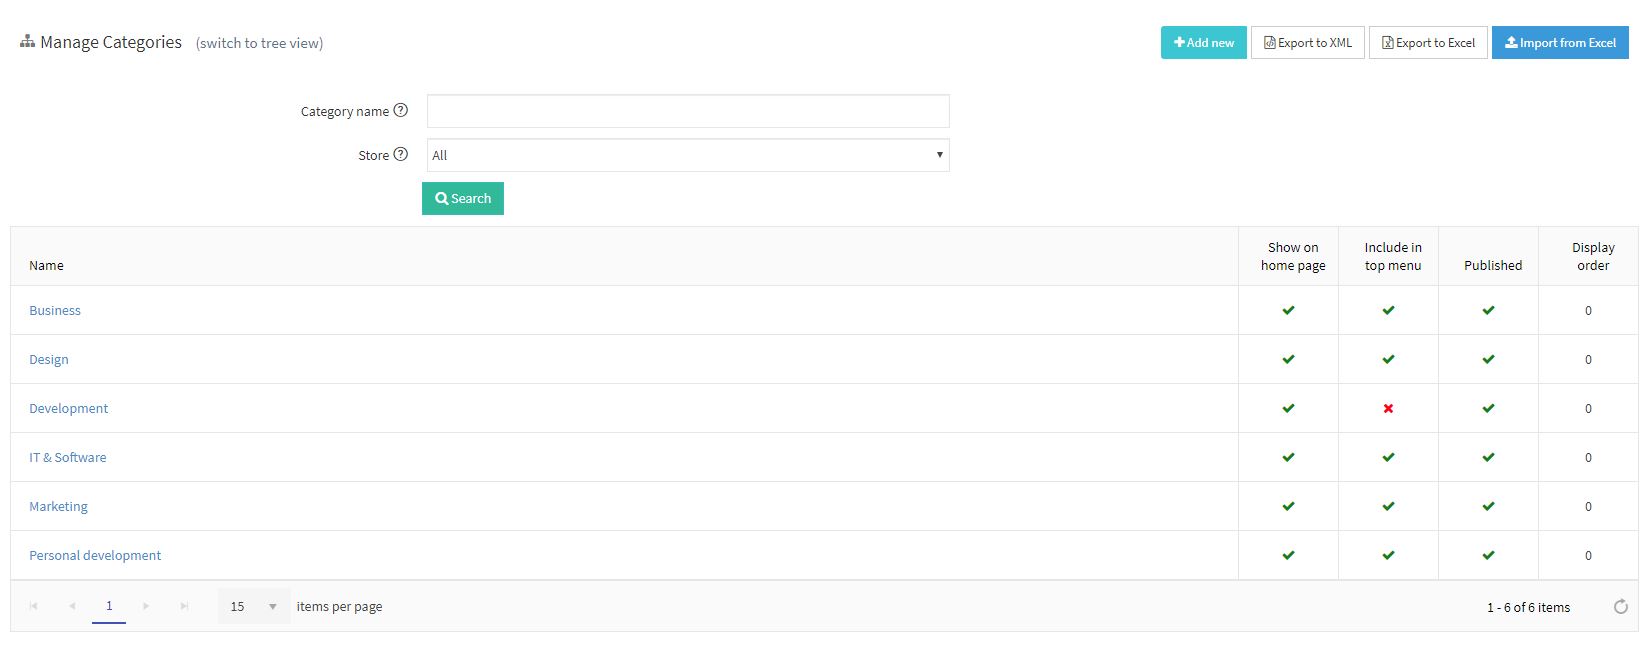
- 6 categories - Business, Design, Development, IT & Software, Marketing, Personal development
- Few products - 3 in each category
Now let's focus on the courses. Navigate to Admin panel -> Content Management -> Manage Courses -> Levels. First of all we have to create levels for courses. As a level, I will use them as the level of difficulty of the course. We will use 4 different levels - Beginner, Intermediate, Advanced, Professional. To create a level, just press the "Add new record" button. In the text field enter the name of the level.
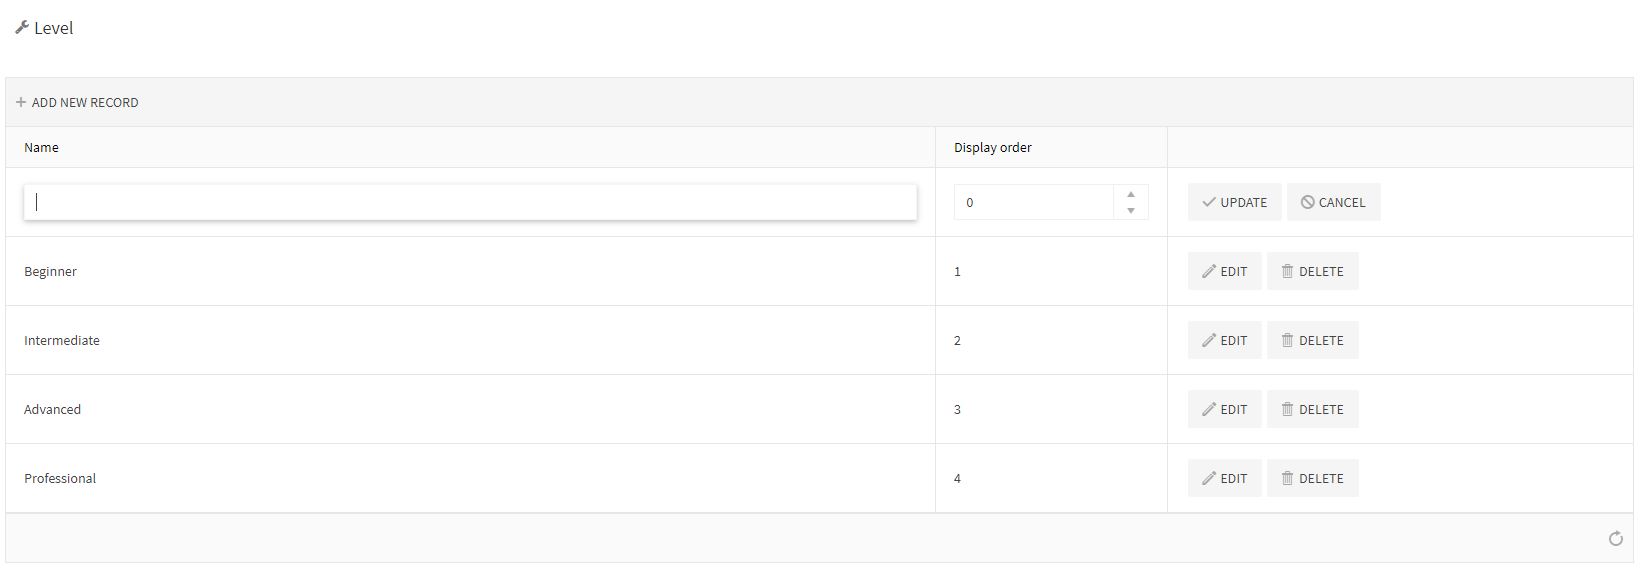
It's name will appear on frontend view, in the brackets next to the name of the course.

It's time to create our first course! Navigate to the Admin panel -> Content Management -> Manage courses -> Courses. To create your course you should press the "Add new" button in the top right corner.

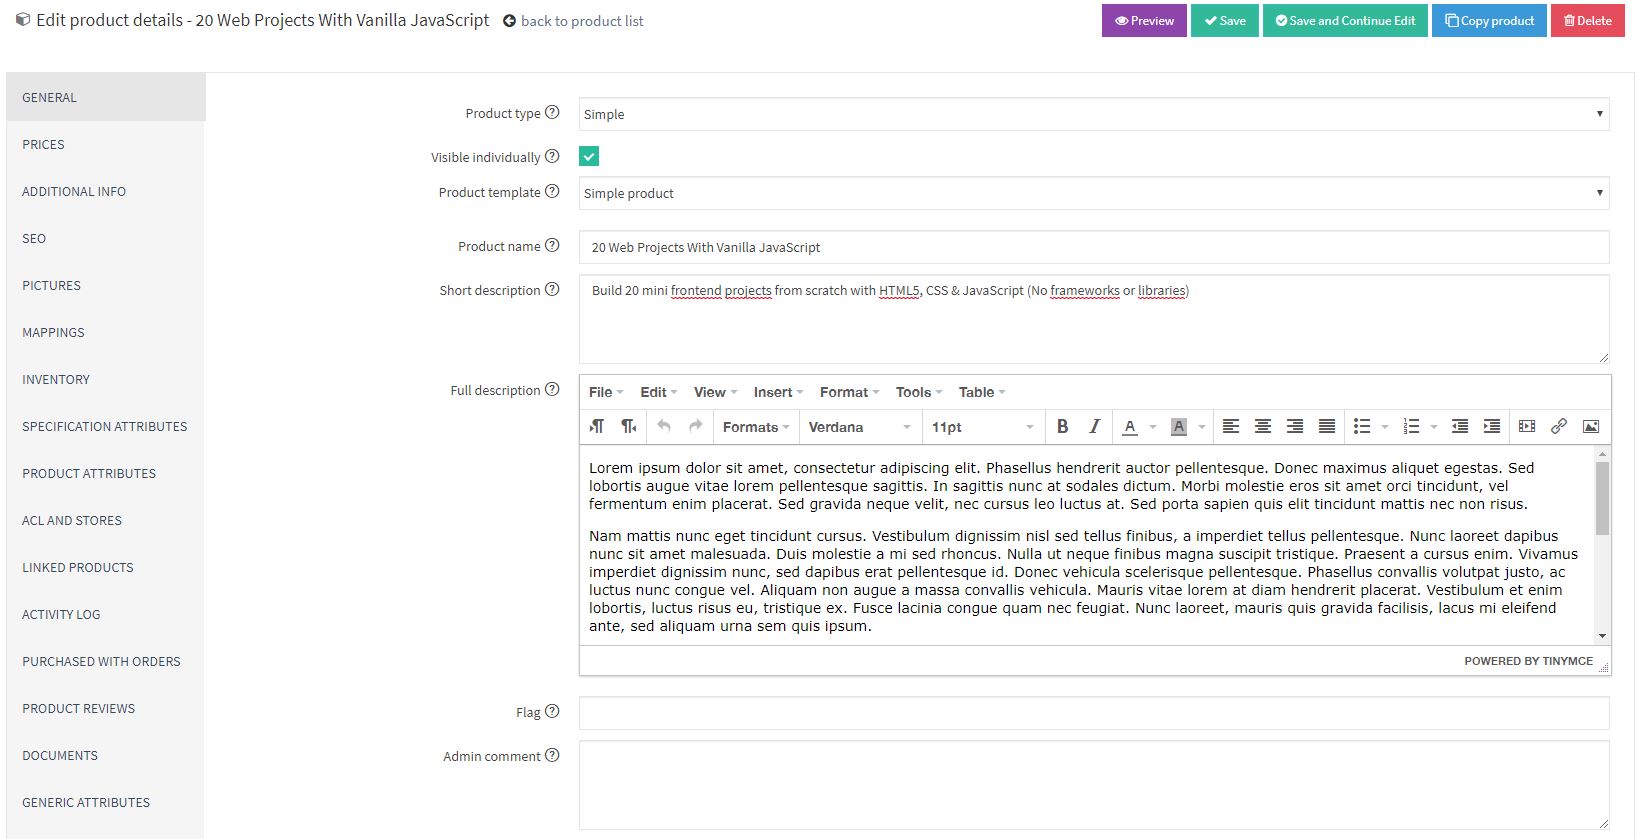
First screen that you will see, defines the general information about your course. First you should specify the Name of the course. Basically you will use the same Name as you used in the product. The second field is a short description, you can provide a short, general overview of course. Both fields - Name and Short Description will be visible in the main page of My courses menu in My account section. Next field - Full description is a place where you can describe your course in details. It's visible on the course page.
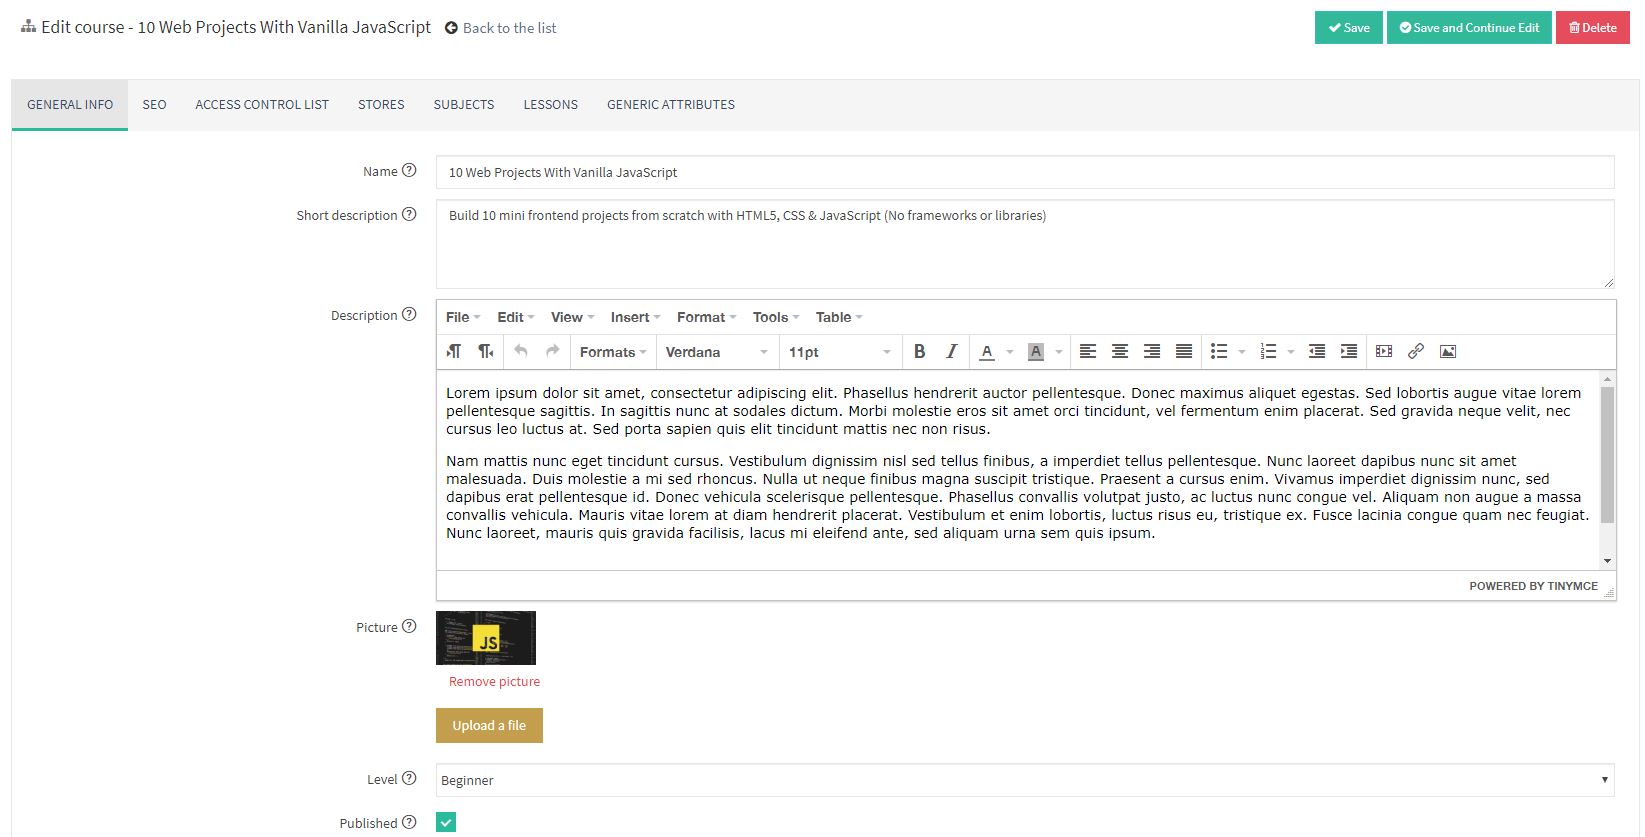
I hope that you have prepared a picture of the course. It's a thumbnail that will be visible in the My course list and on the Course details page. In my example I used the picture of the product. I suppose you will do the same. Finally, you can assign your course to the level. In fact, it can be called as category. Just assign it to my levels, created before. Published and Display order fields are obvious. Published defines if this course is visible on the public store or not, Display order defines the position of course on the list. Finally, we can assign product to our course. After that action, customers who will purchase assigned product, automatically will get the access to our newly created course.

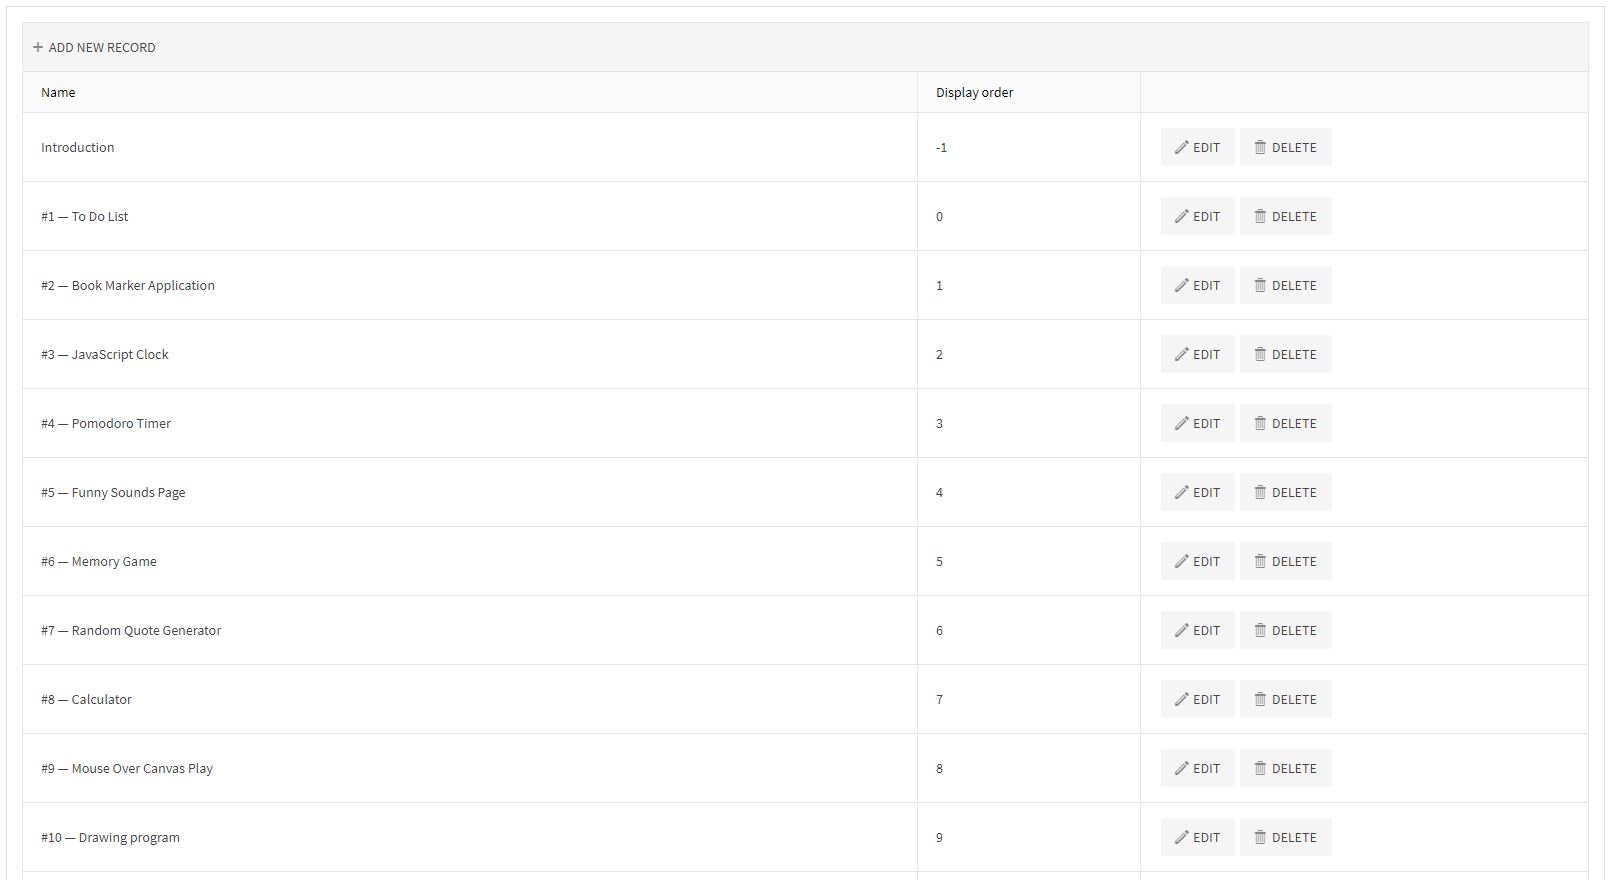
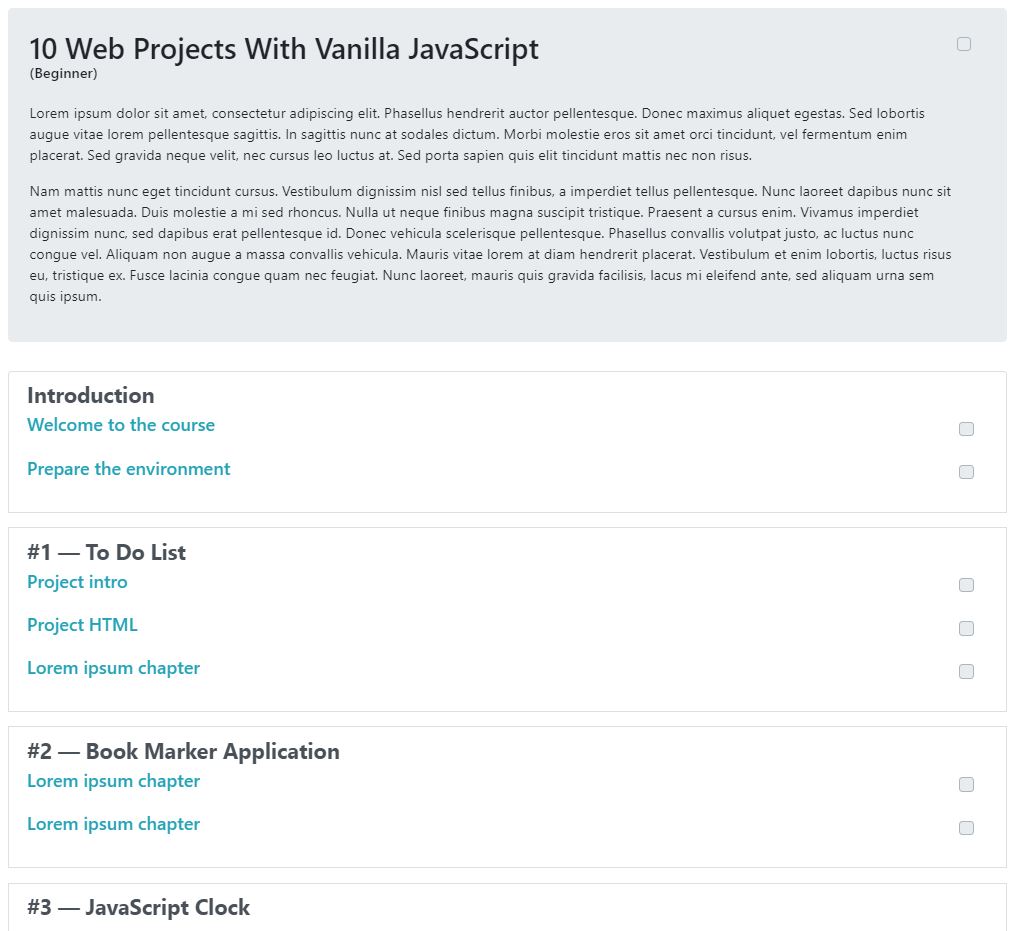
Finally, we've created the background of our course. Now we will create the skeleton of the course. Please press the Save and Continue Edit button. It will save changes and keep us on the edition screen. Jump to the Subject section. Subject is nothing more than a section of the course. Our example will be divided into 20 sections, each section is a different project. Inside each subject, we will have lessons with video file. Take your time and create as many subject as you want.
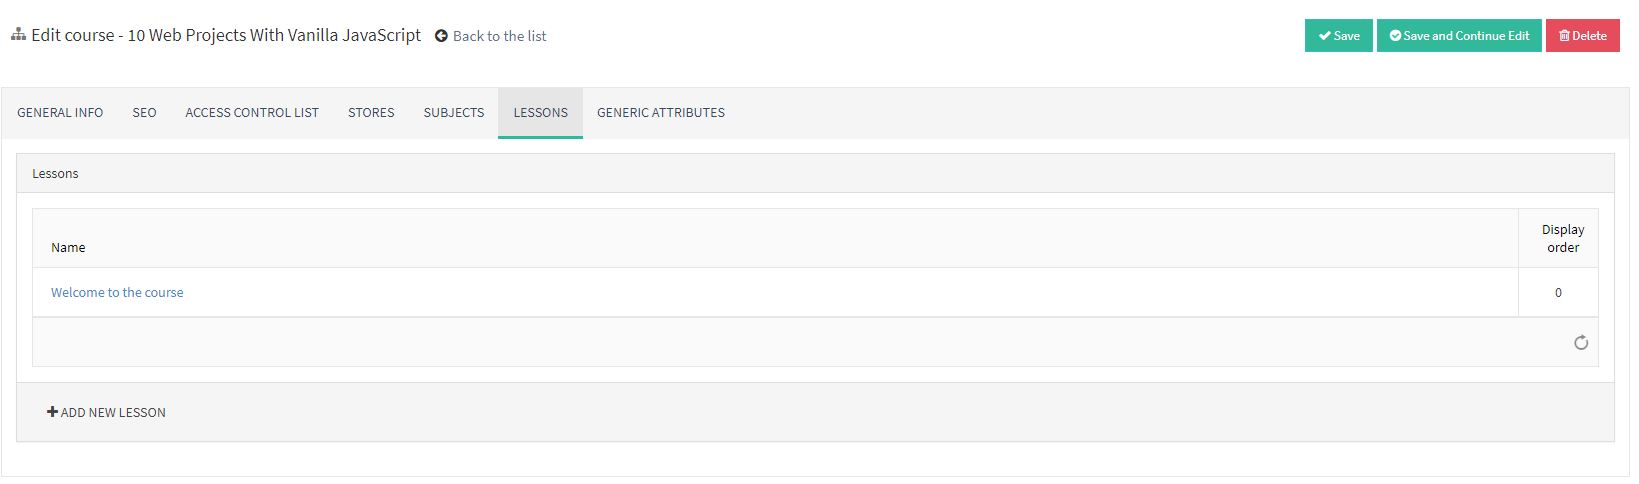
Now, let's focus on the lessons. Lesson is the last part of the course. To add new lesson, just go to Lessons tab and press the Add new lesson button. You will be redirected to the new page. Beginning is very typical, you should provide the Name of the lesson, short description of it. The Full description field can be used as a place where you will insert the transcription of the course.
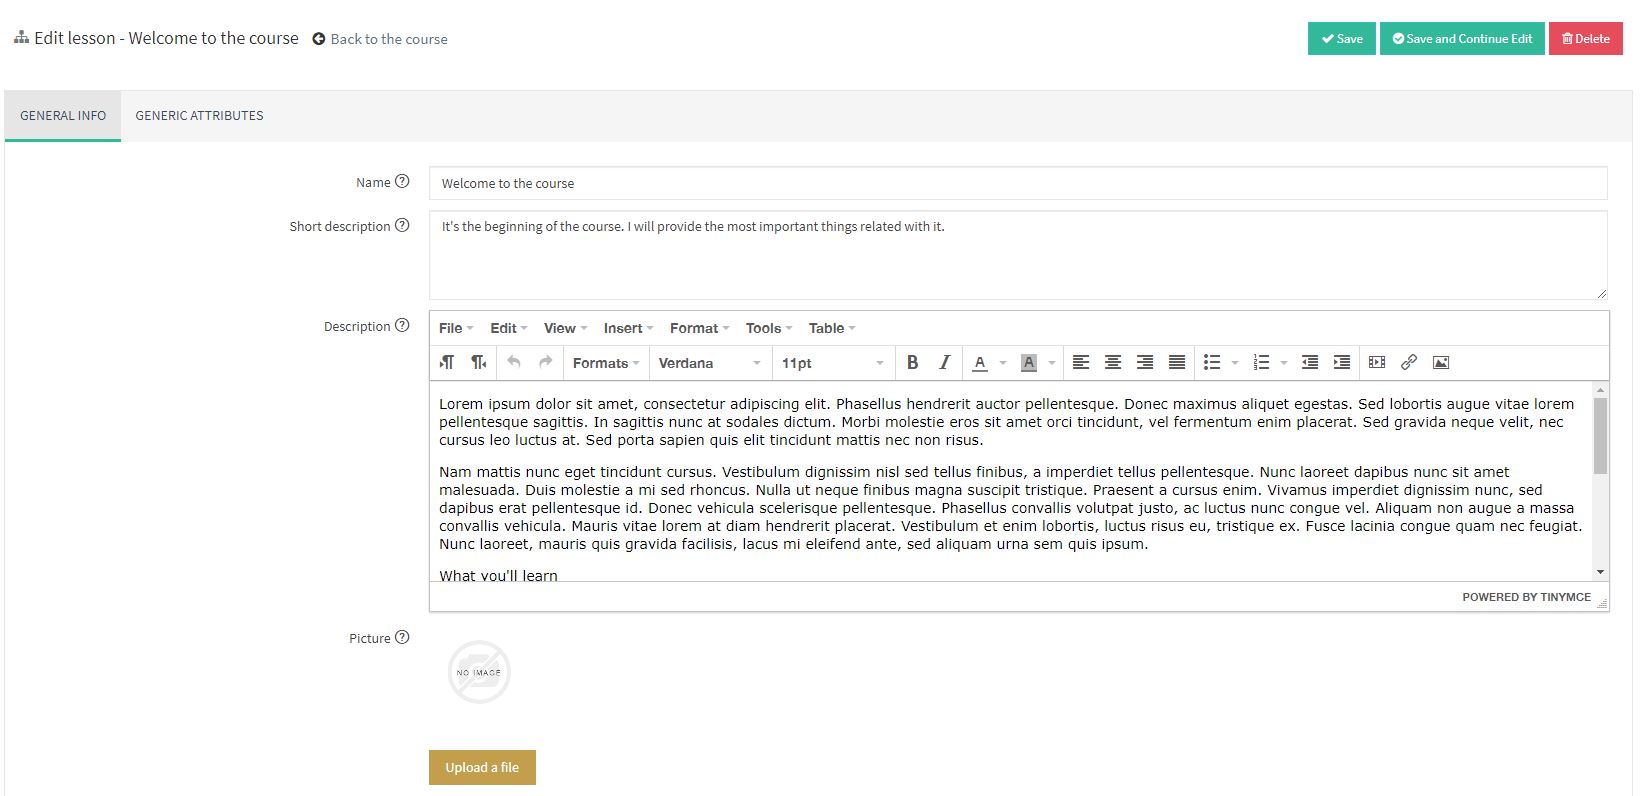
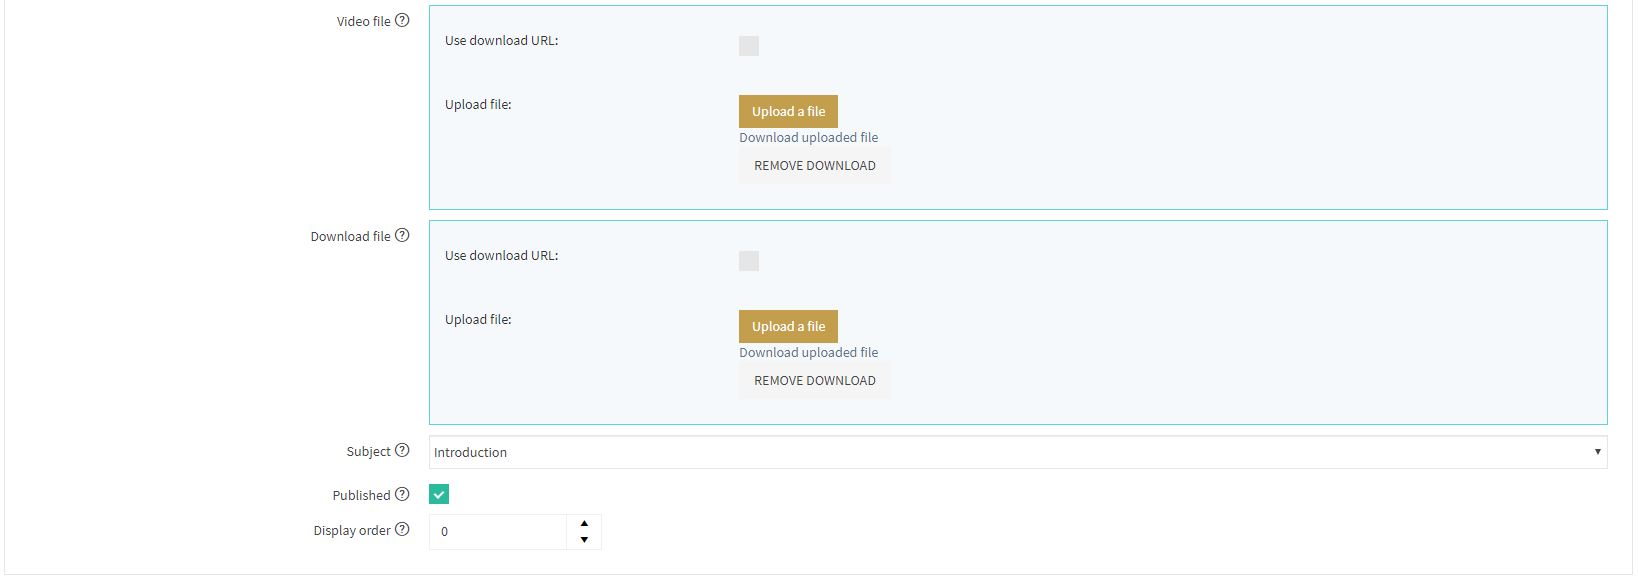
Next field is an Picture of the lesson. Everything depends on the design. If you want, you can totally remove the lessons pictures and hide them in the cshtml files of the theme. In the next field, you will have possibility to insert the video of the lesson. It supports almost each format of video (of course formats supported by HTML player). Download file field is used to provide additional content for the course like source code used in the projects and so on. The last thing is to assign the lesson to subject and save changes. You will back to the Course edition page. You can save all changes and test it's work.
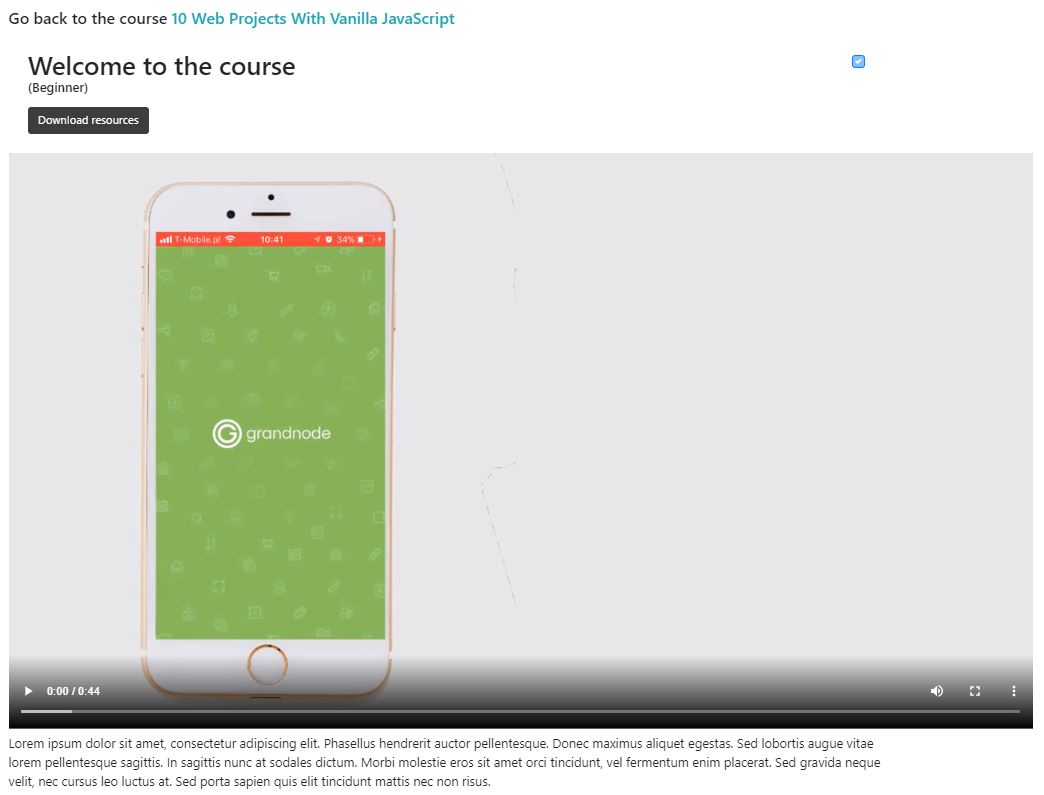
Navigate to your created product and purchase it. After successful order placement, you will be able to access to the course. Navigate to My Account section -> My Courses and have fun!
Customization - How to make it better?
Of course many parts of GrandNode can be disabled, because in the case of online courses we don't have to ship items. So it's totally obvious that we should turn off the Shipping for that products. We should also change some resource strings, because we don't want to sell products, but courses.
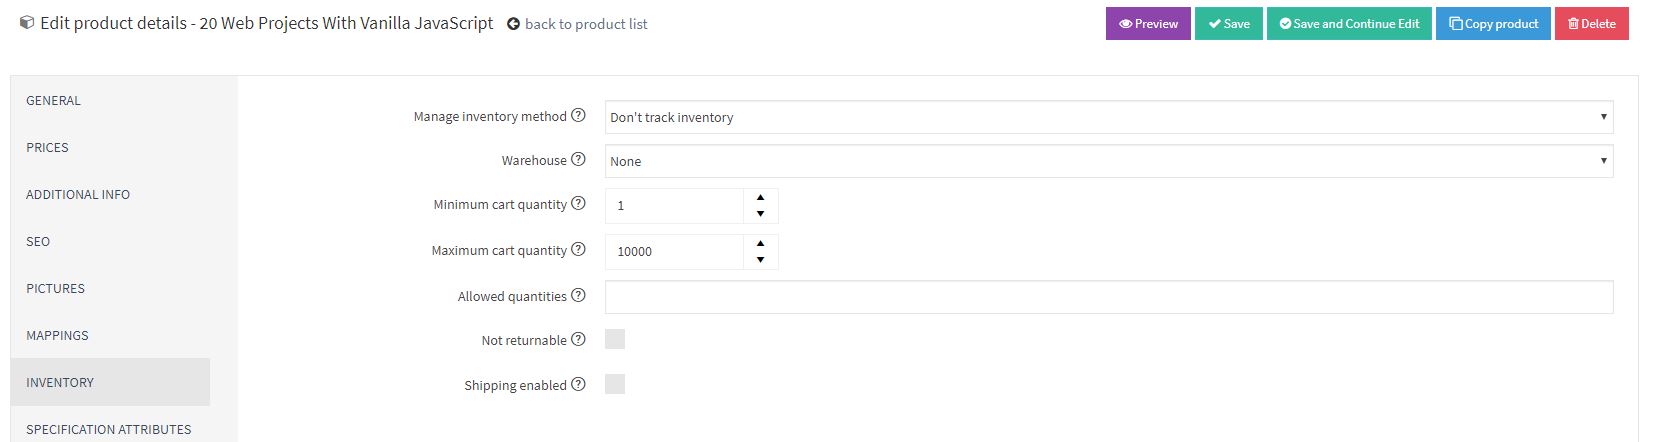
To disable Shipping, you should visit the product edit page and navigate to Inventory tab. It's time to uncheck the "Shipping enabled" checkbox.
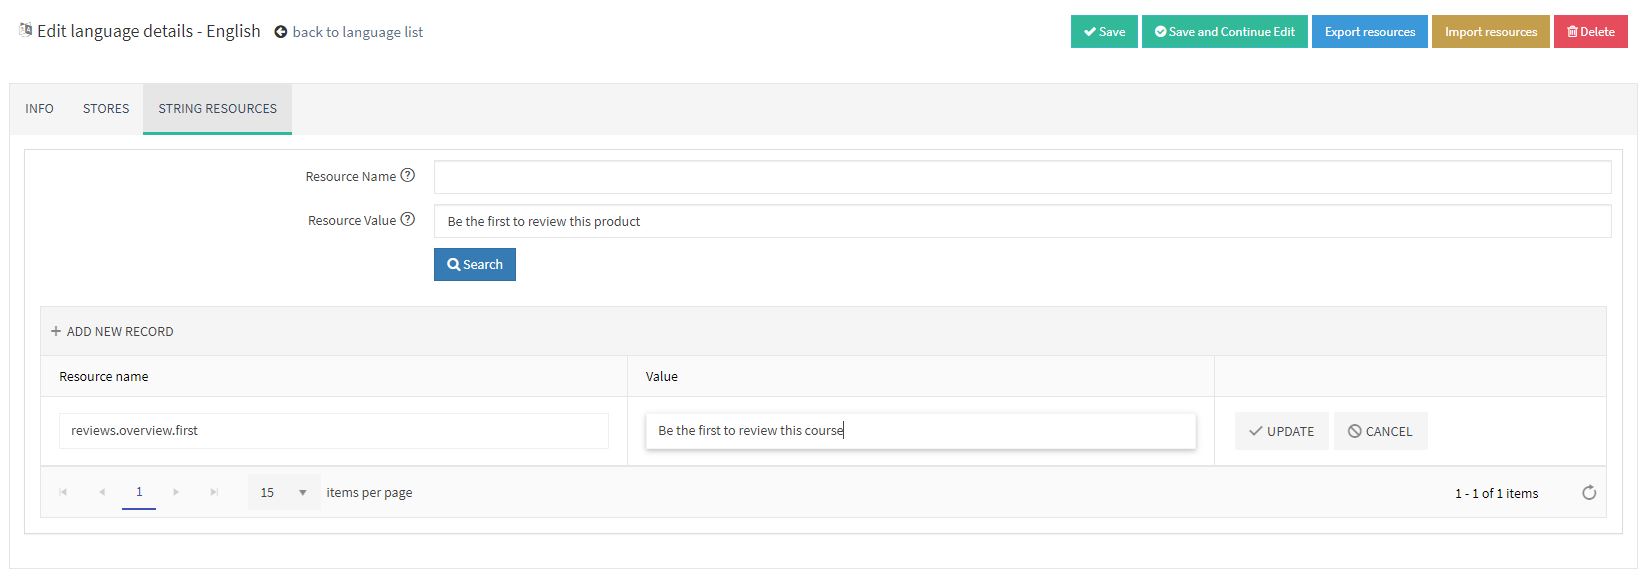
Now we will change resource strings. Navigate to Admin panel -> Configuration -> Languages -> Edit your language, press the Resource strings tab. For example, if you want to change the Be the first to review this product into Be the first to review this course, just enter it in the Value field in the filtering section. It will show you the record with that resource string. Press the edit button and change the translation. Save changes and that's all! You can do it with almost every part of the store.
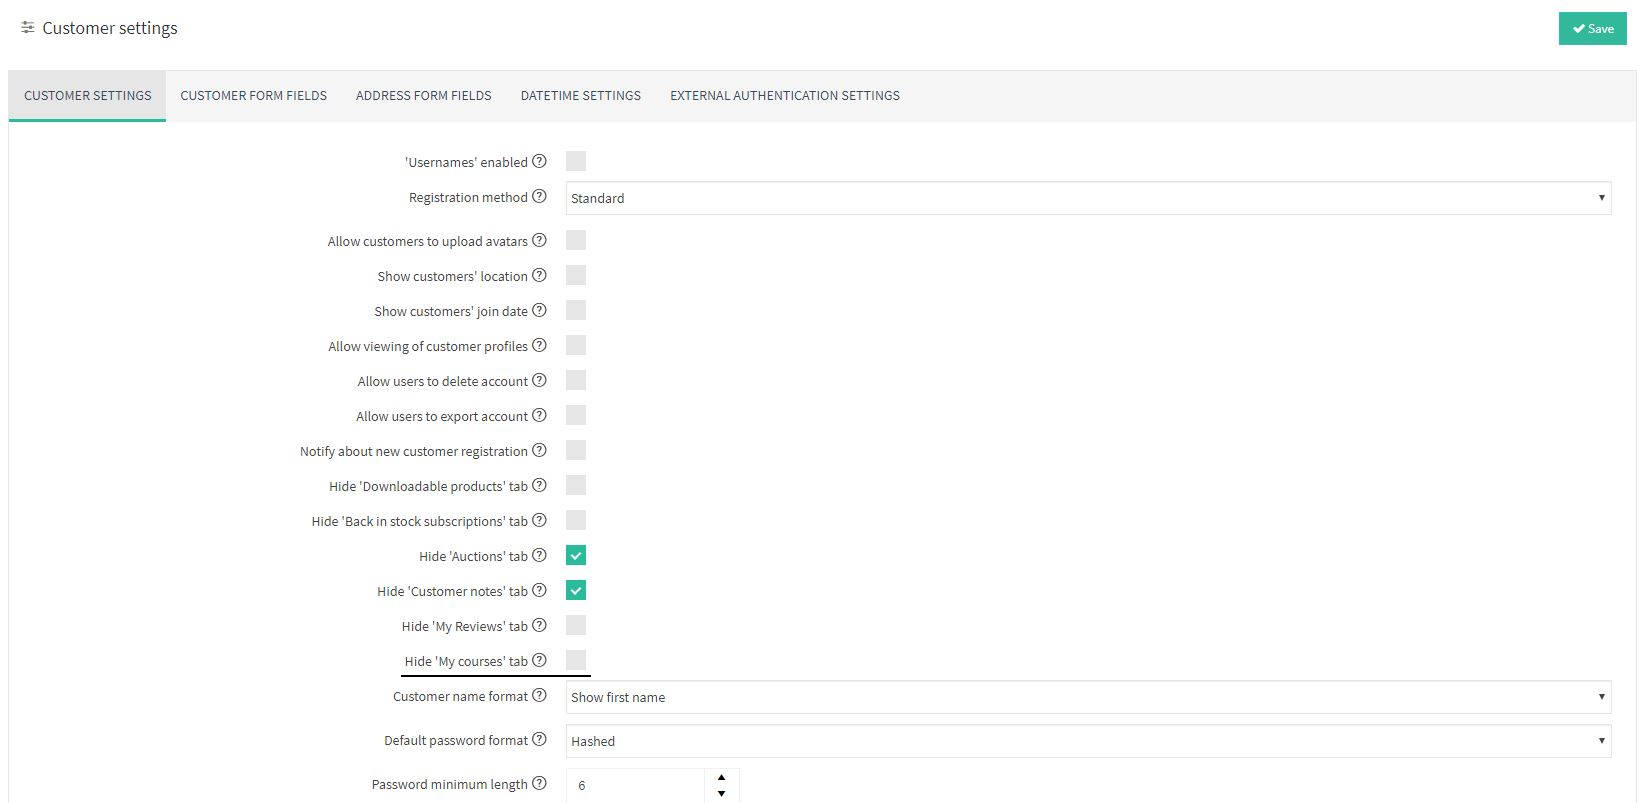
Show the My courses menu, to show the menu with courses, you should enable it, because by default, we hide it. To enable it, just navigate to Admin Panel -> Configuration -> Settings -> Customer settings and uncheck the Hide "My Courses" tab.
You can also make courses filterable. You can filter them by author, level or anything you want. With help comes the Ajax Filters plugin, after installation you will be able to filter courses without reloading page. By default, each change will reload page, it may be boring for customers. Improve the user experience and speed up this process. Ajax Filters will be assigned to this blog post, so you can check them easily.


Leave your comment